DIY Wish House to Supercharge Your Hopes and Dreams

I’m wishing…

Here in the northern hemisphere, the days get shorter and shorter, the nights get colder and colder, and sometimes we need a bit of help to to honor and respect the cold, dark, and stillness. This year, in particular, winter is conjuring thoughts of Persephone, stuck in the underworld, living with Hades. There seem to be more reasons than usual to feel discouraged and maybe downright blue. So what better time to create a healing tool to bring focus on your aspirations: hopes, dreams, affirmations, resolutions…wishes!

And that’s just what the Wish House is for.

What’s a Wish House?
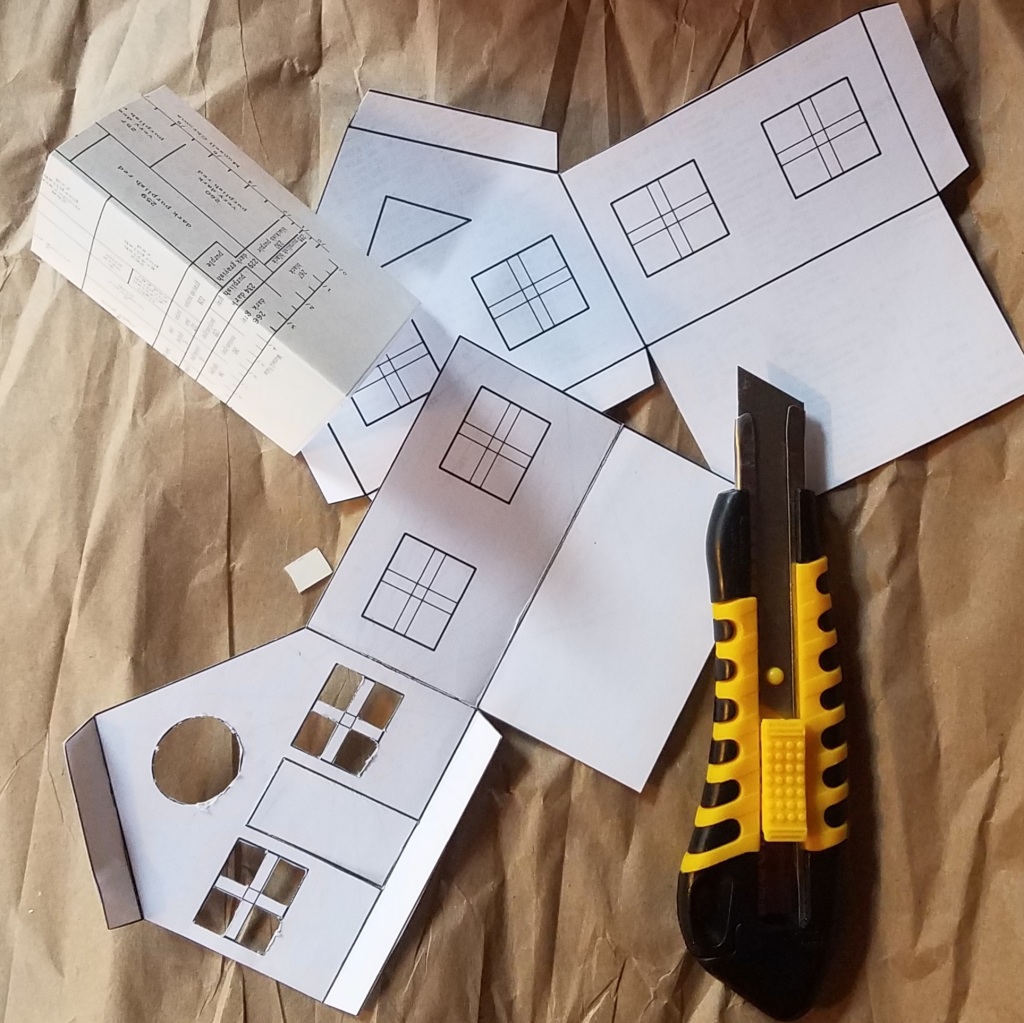
It’s a simple paper construction that you make yourself. It might be for you to use, or it might be something you want to give to someone you care for. It’s designed to clarify and focus your good wishes, hopes, aspirations, even your yearnings.

How does it work?

Let’s cut to the chase: a wish house is a magical object. It follows the same principles as the 70s-era pyramids, made to concentrate energies. We don’t know how the magic works, if it works, or if the magic is you as you make it and use it.

Nonetheless, I’m happy to share the pattern and method for making and using a wish house. As far as I can tell, the magic begins when you decide to make one. It begins to clarify and focus as soon as you start to step through the process.
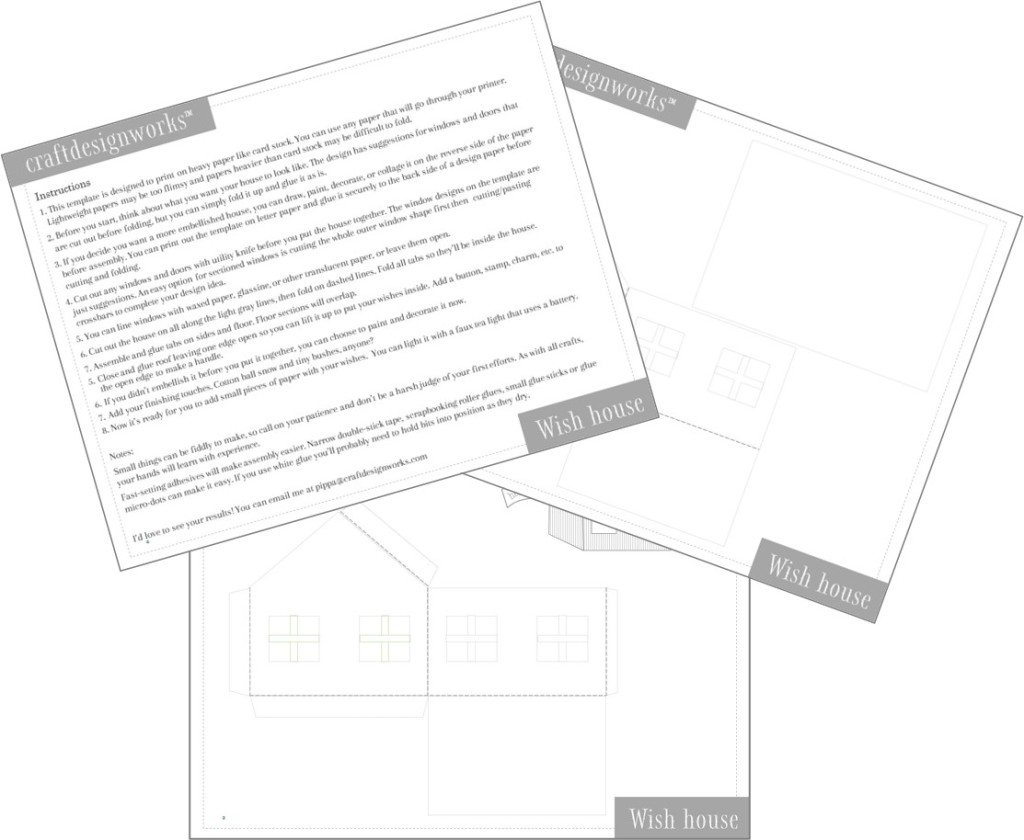
Here are the elements you can personalize so you can fully power up your wish house:

1 – Intention

First, you can clarify the intention. Are you making something for yourself or for someone else? Pause for a moment and see the power you want to invoke, the changes you’d like it to bring. My wish house for 2022 welcomed vision and transformation with a golden butterfly and an antique hand. My wish house for the new year of 2023 invited right brain/left brain interplay. What sounds right for your life?

2 – Exterior

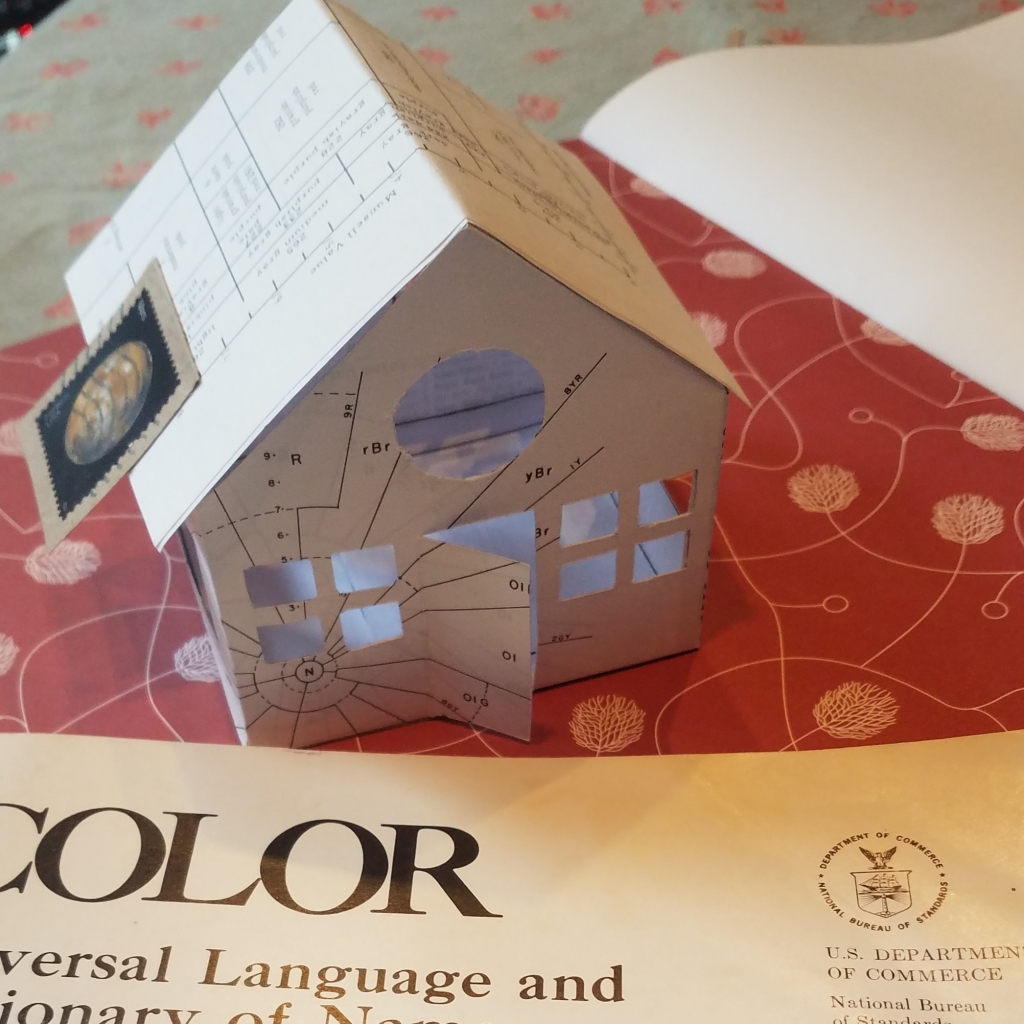
What will you make it out of? Old books, letters, copies of family photos, flags, drawings? For 2023 I used a book that had been discarded from our library, full of very technical information and data about color. I liked that it combined left brain and right brain content in one place.
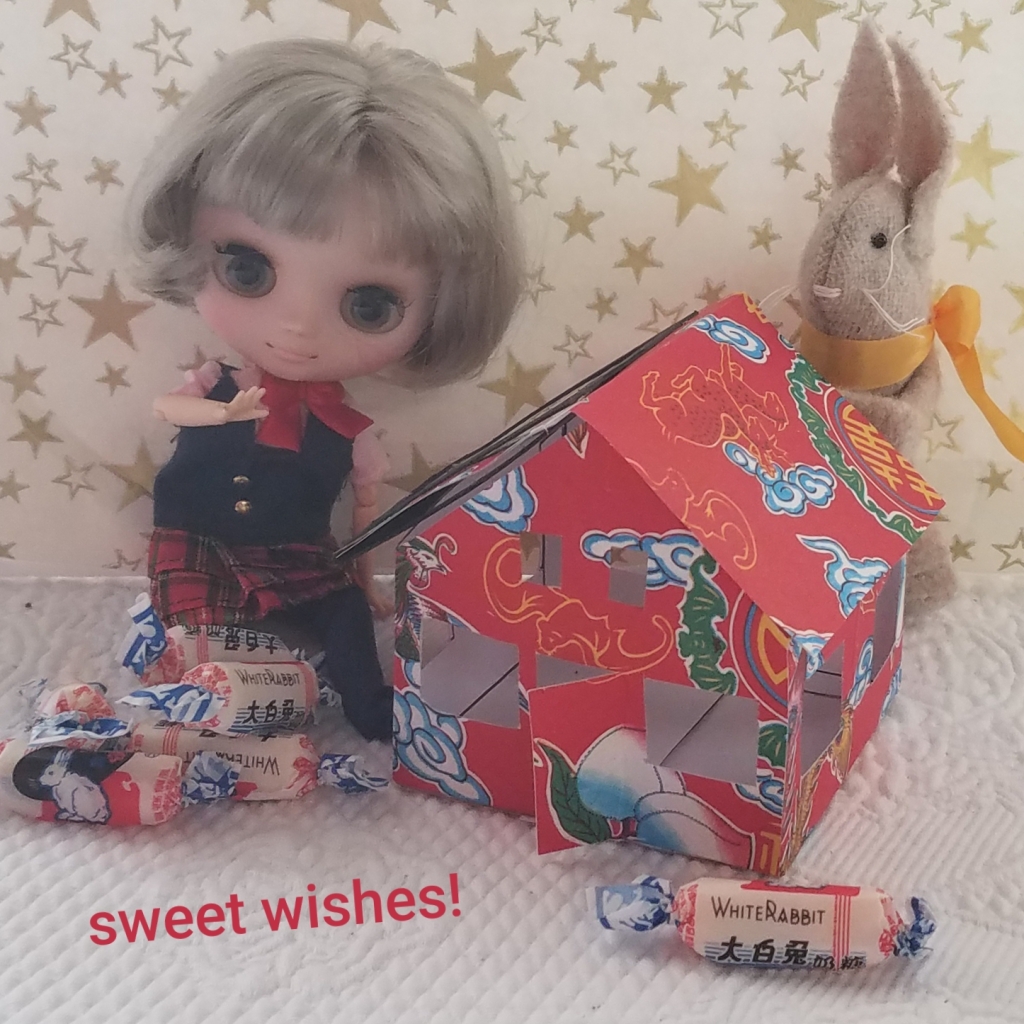
For the Year of the Rabbit, I used Asian red wrapping paper covered in auspicious symbols.
3 – Windows? Doors?

What openings will your house have? What kind of windows do you want to make? Will they be open and empty, made of waxed paper, cellophane or glassine? Will you fill them with images that resonate with your wishes?

4 – Roof and closure
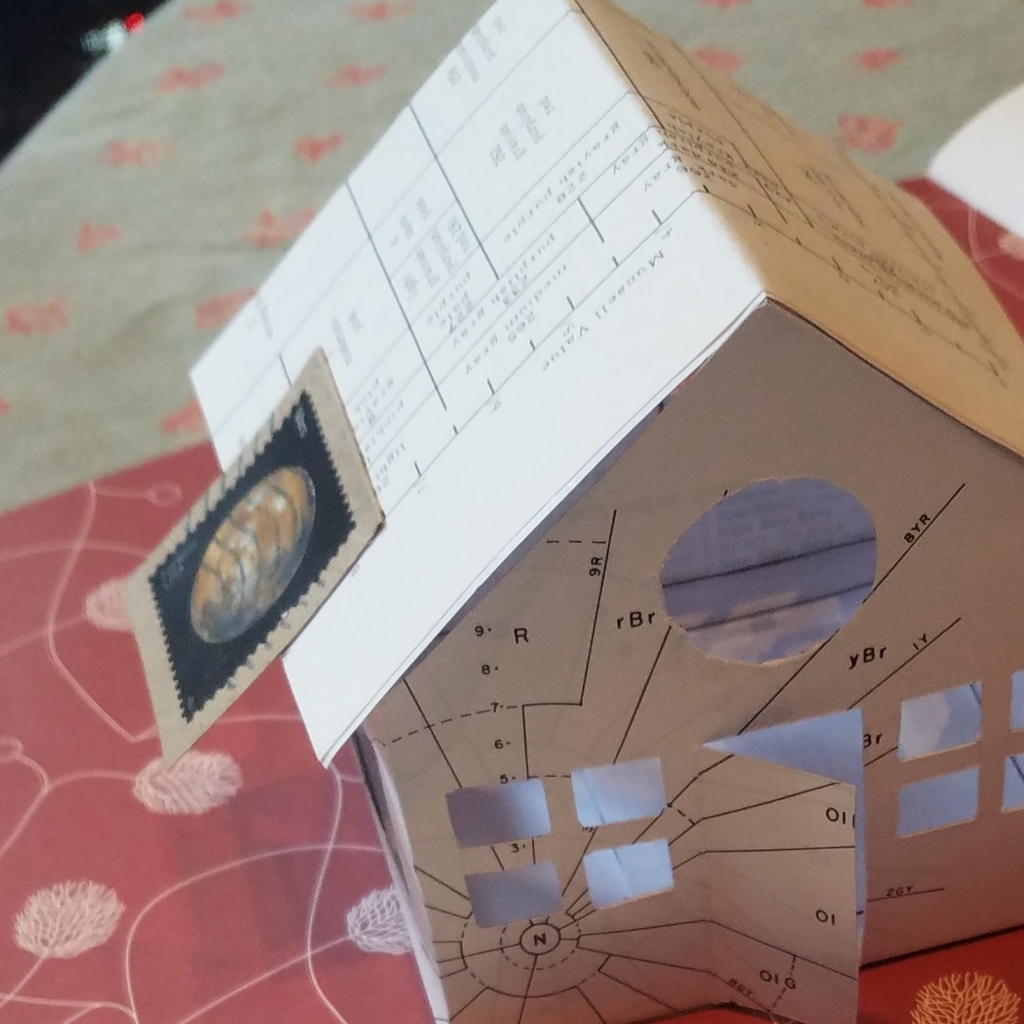
How will the wishes get in? The pattern is designed for one side of the roof to lift open. I like to choose a special image to be the roof handle, so every time I open or close it I’m reminded of the meaning.

5 – Illuminate

To make it glow, you can put a flameless tea light in inside it. Since it’s made of paper, I don’t recommend using an actual candle, unless it’s safely resting inside your fireplace or outdoors, where you won’t create a disaster instead of furthering your wishes.

6 – The wishes

The wishes can be simple slips of paper with the wishes written on them or small objects you find meaningful. For example, If you have healing wishes for someone far away (or someone who’s passed to the other side), you could slip a small photo into your wish house. Or your wish house can be a home for your current affirmations.

7 – Ritual

My ritual is simple. When I’m so moved, I write things on slips of paper and put them into the house while thinking about them. I let them build up over the year. On New Year’s Eve, with a fire in my fireplace, I burn them one at a time, releasing their energies as I think about how they’ve manifested in my life. Or maybe that I need to bring the same wish forward into the new year. Do whatever makes sense for you.

8 – Sharing

If you’ve made it as a gift, have fun and use your imagination wrapping it up for the recipient. Maybe even start them off with a wish or two.

If you want to send it but don’t want to deal with finding the right box to house it as it travels, you have 2 other options: cut and fold it so it fits into a 5×7 envelope with the instructions for putting it together; or send the 3 pages, unfolded, in a 9×12 envelope for the recipient to construct themselves.
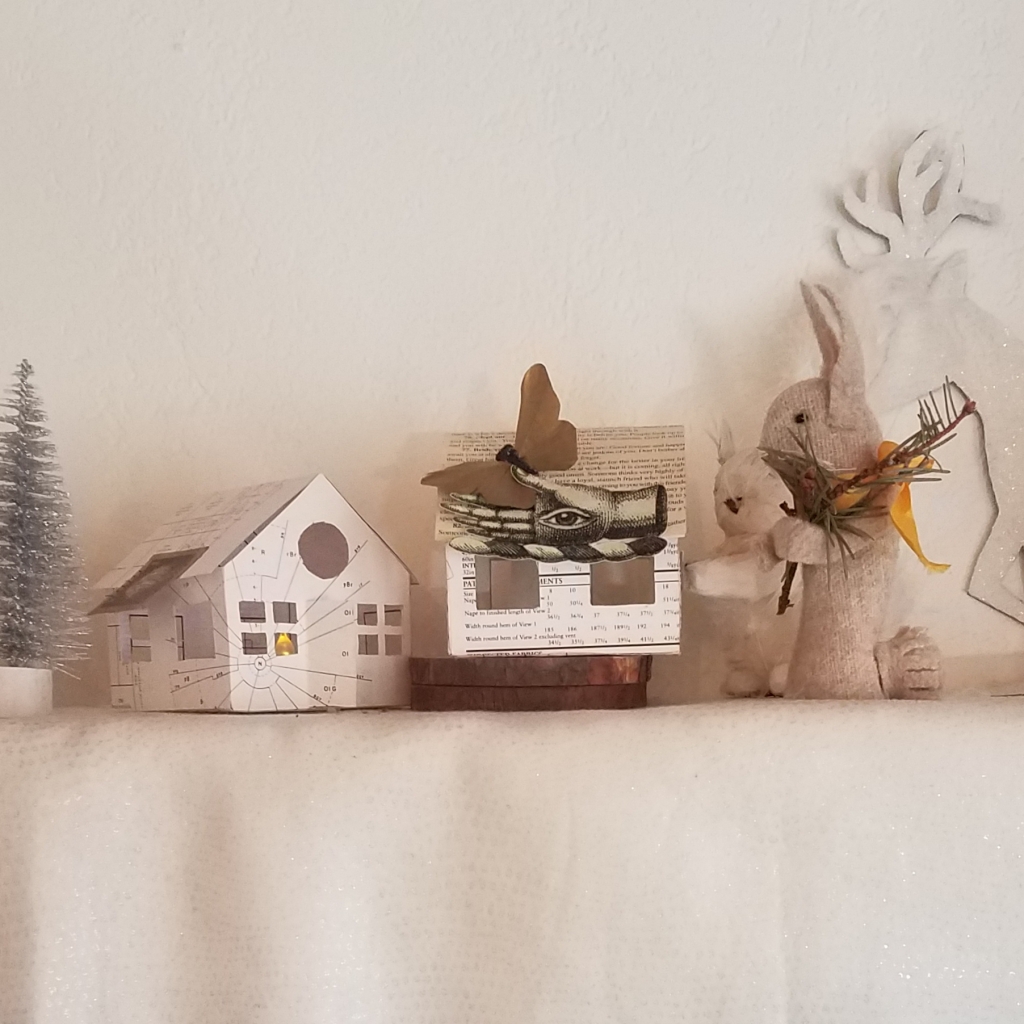
I hope you’ll feel a bit cheered, and maybe inspired, at the idea of a wish house to invite and strengthen energies in your life. I do believe we cannot afford to despair right now. Magnifying hopes and dreams is an important affirmation of their power. My wish house for 2024 will be powering up my wishes for the world to hold more compassion, understanding, and peace as we move forward. Onward!

Please let me know if you make one!

Little Witch Costume Tutorial

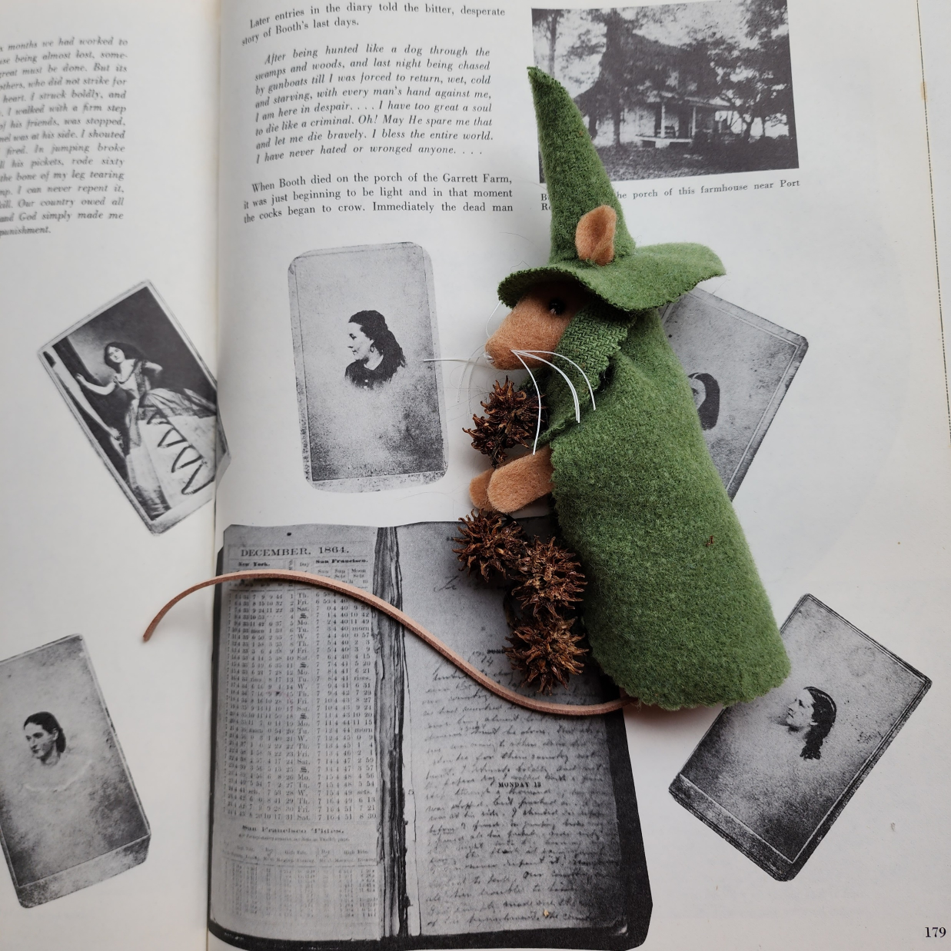
An easy costume to dress up your little mouse, rabbit, or pig for Halloween or anytime you need a witch in your cast of characters. This one is a green witch, a little earth witch. I’m pretty sure she specializes in plants and herbal magics.

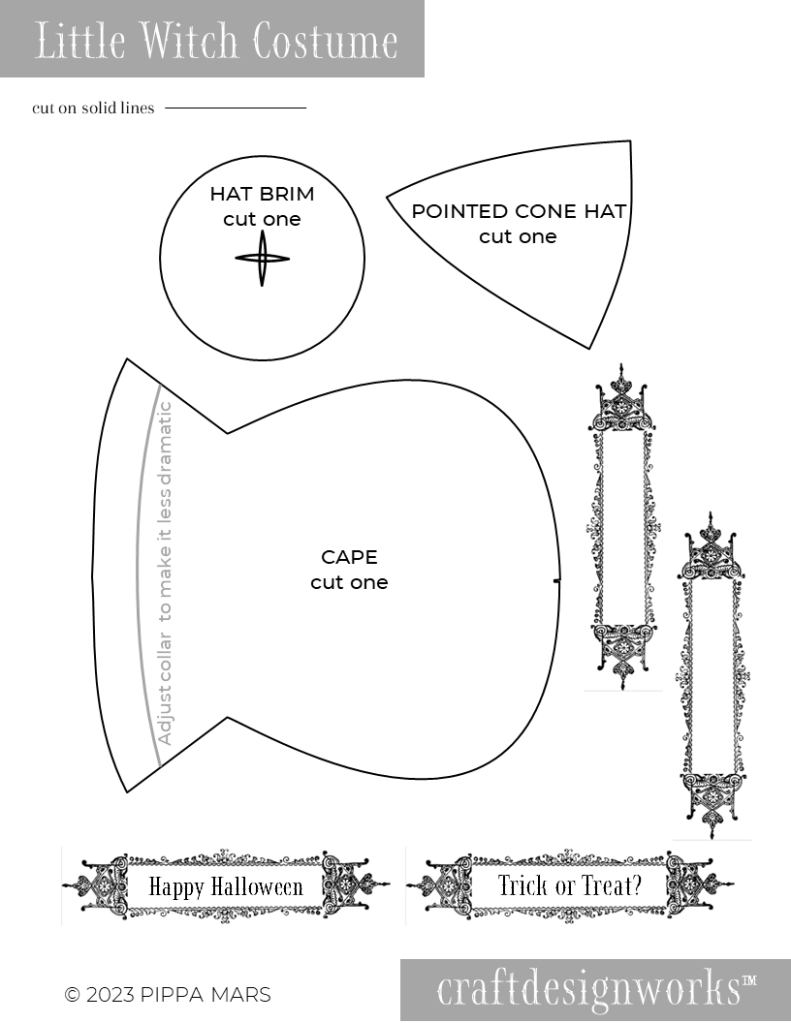
Start by downloading the free pattern here.

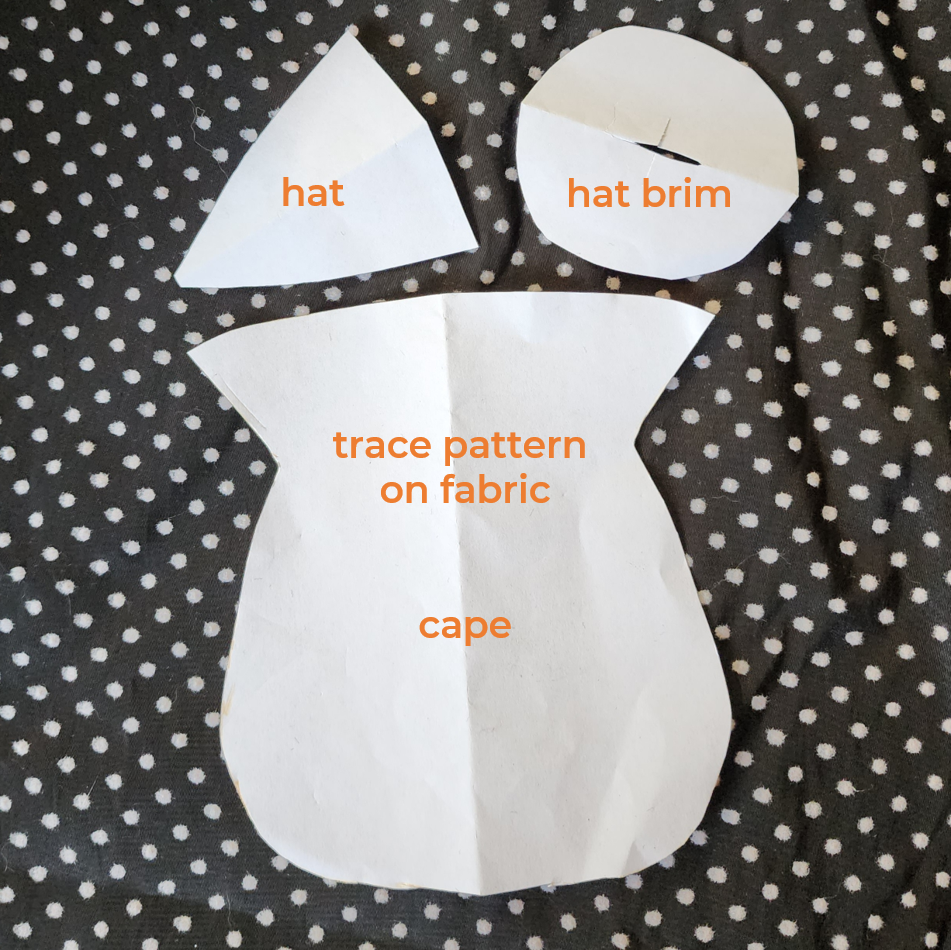
Trace the outlines of the 3 pattern pieces onto your fabric with chalk, crayon, or pen, depending on what will show up best.

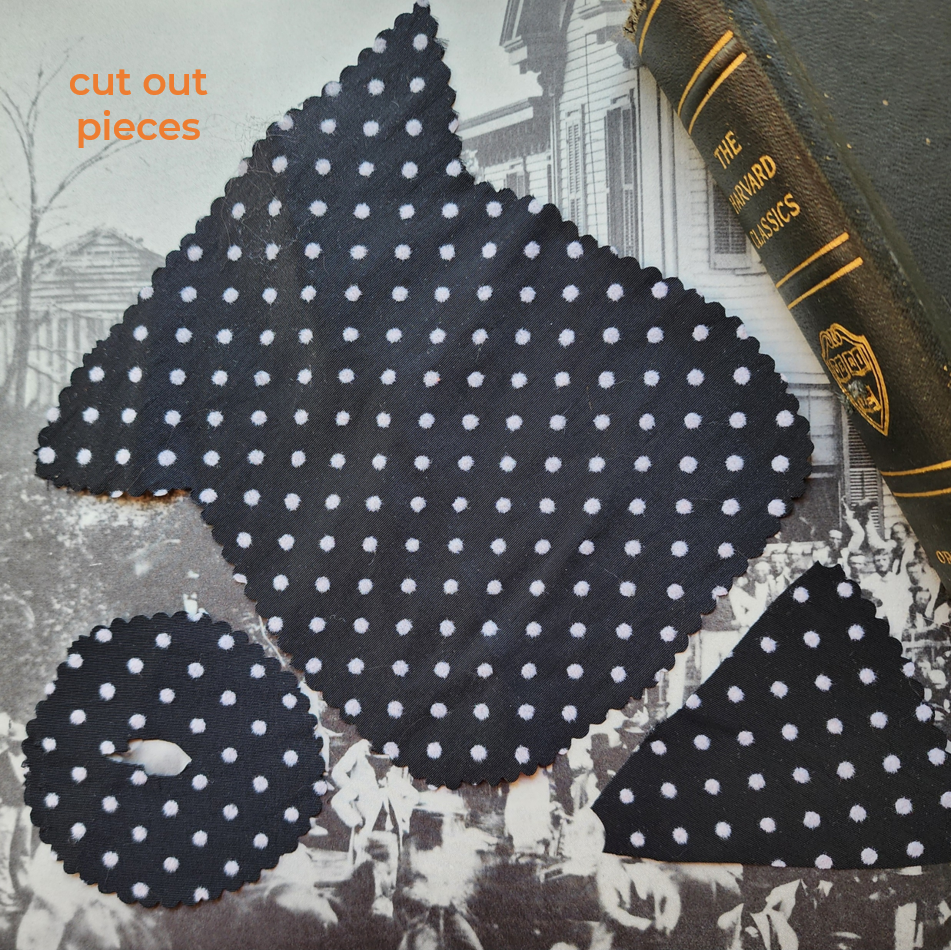
Cut out the pieces. If you have scissors that make fancy edges, they can be fun to use for this costume.

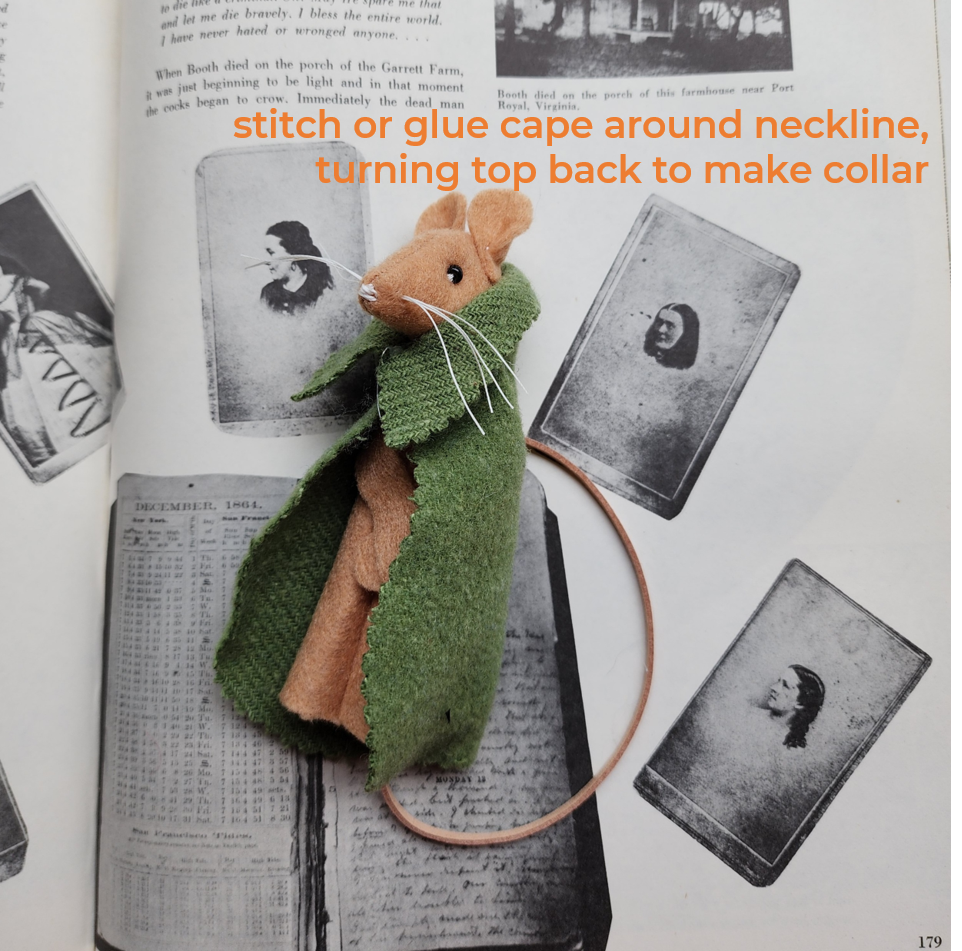
I’ve switched to the green fabric I used for this witch. The next step is to fasten the cape around the character’s neck. The pattern has an exaggerated collar shape that you can trim down if you don’t want the collar to be so dramatic.

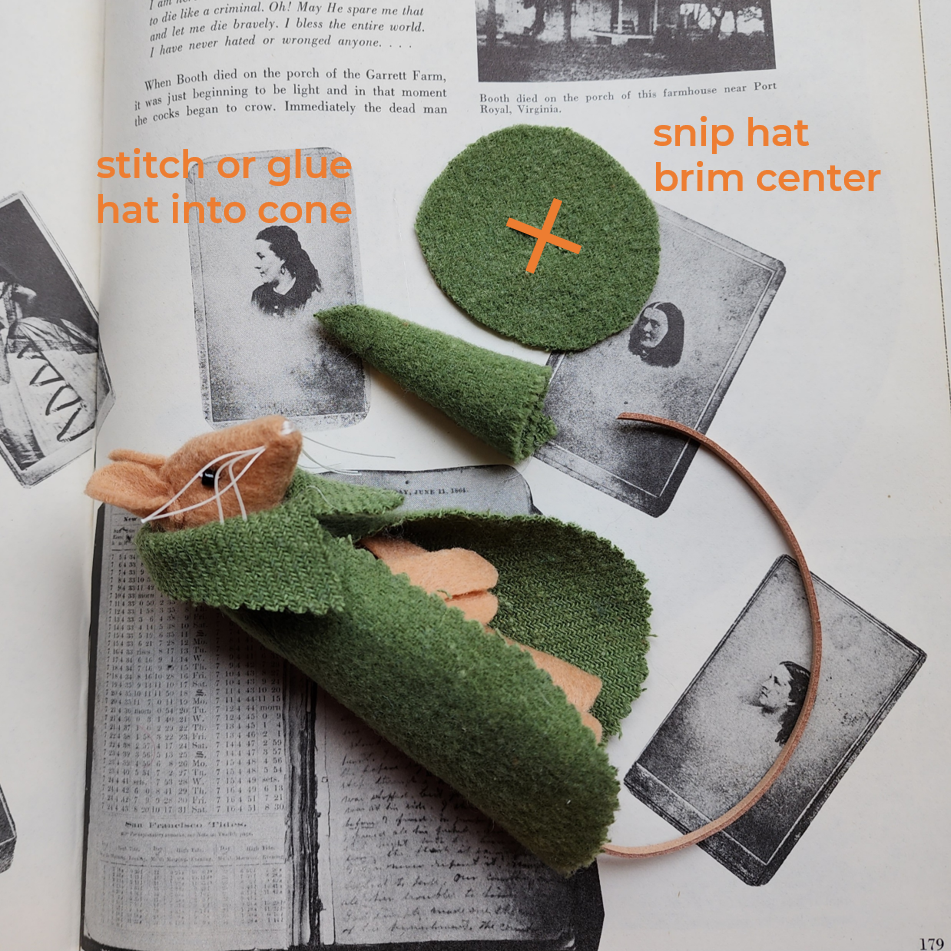
Prep the hat sections. Glue or stitch the cone shape for the pointy part of the hat. Make an x-shaped slit in the middle of the brim section.

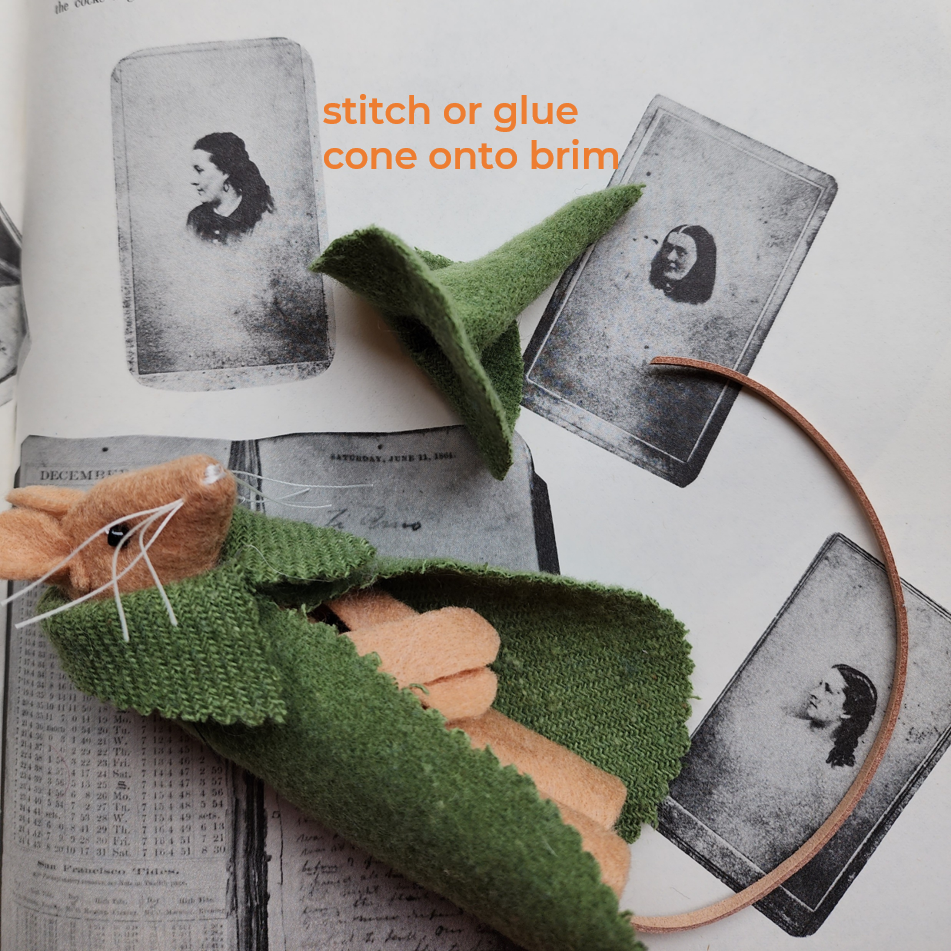
Stitch or glue the cone onto the brim, leaving the bottom of the cone open around the x-shaped slit so you can do the next step.

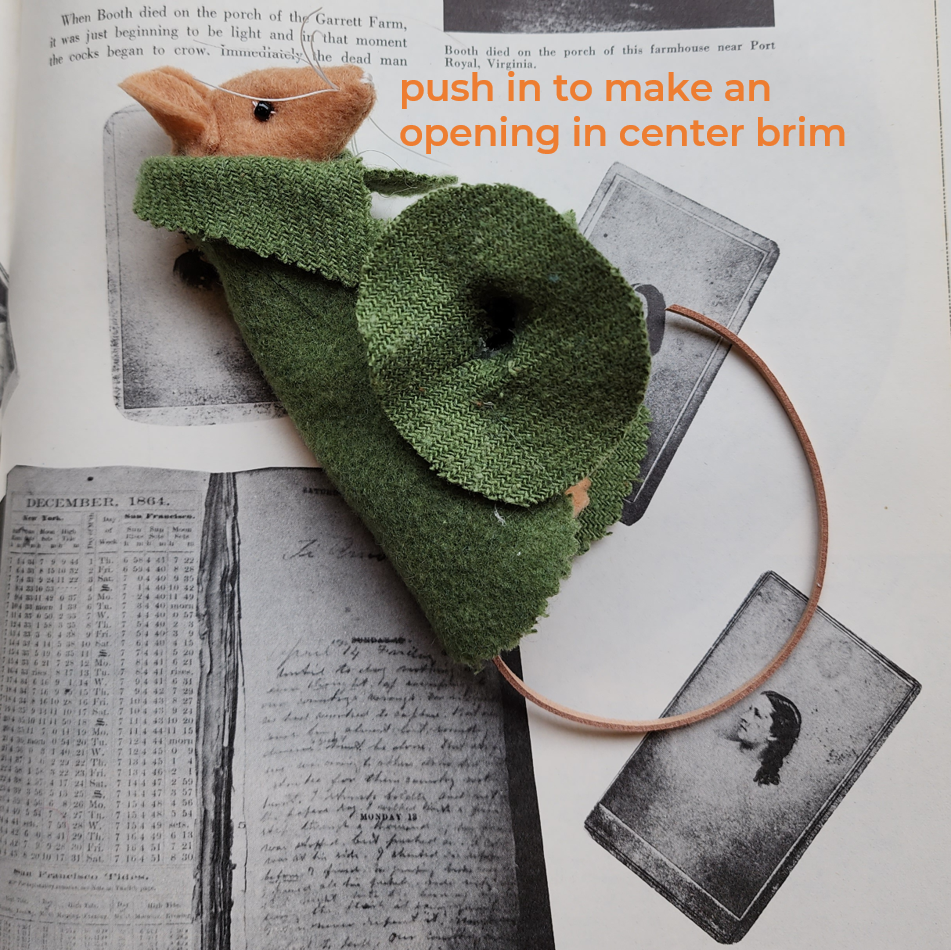
Push your finger into the middle of the hat, so you’ll be able to put the hat onto the animal’s head.

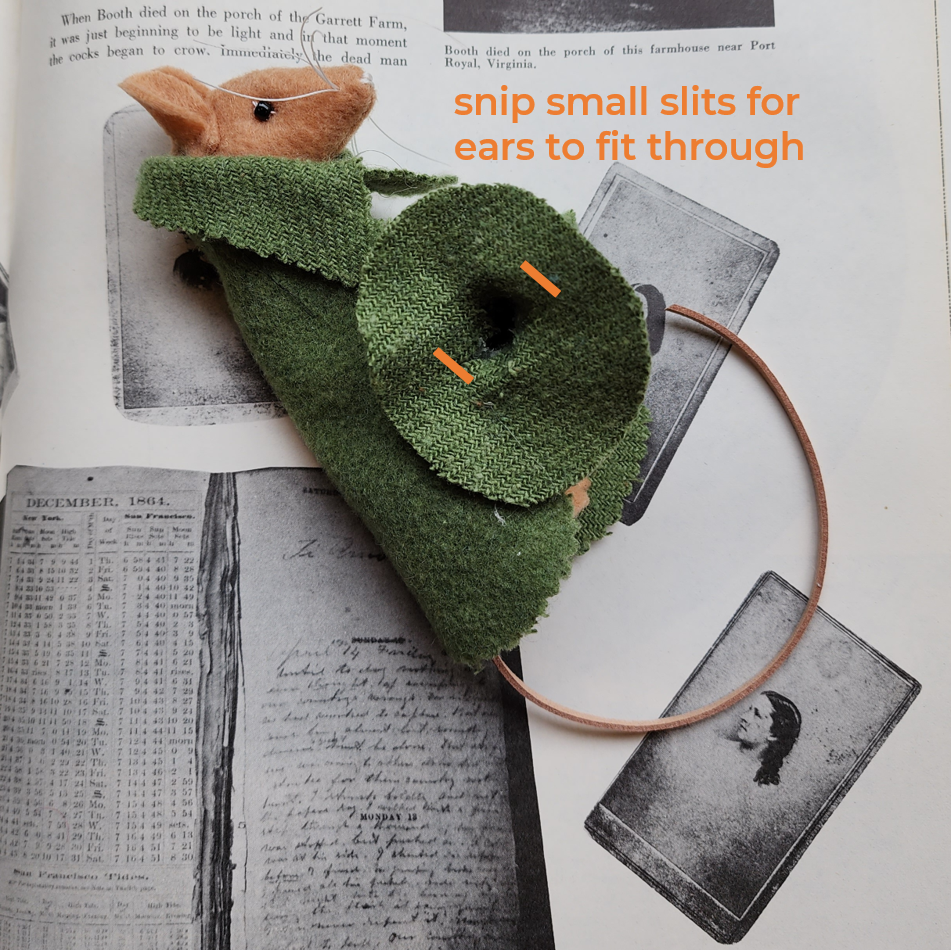
Snip a small slit through the brim on either side of the middle of the hat. This will let you slip the character’s ears through the brim.

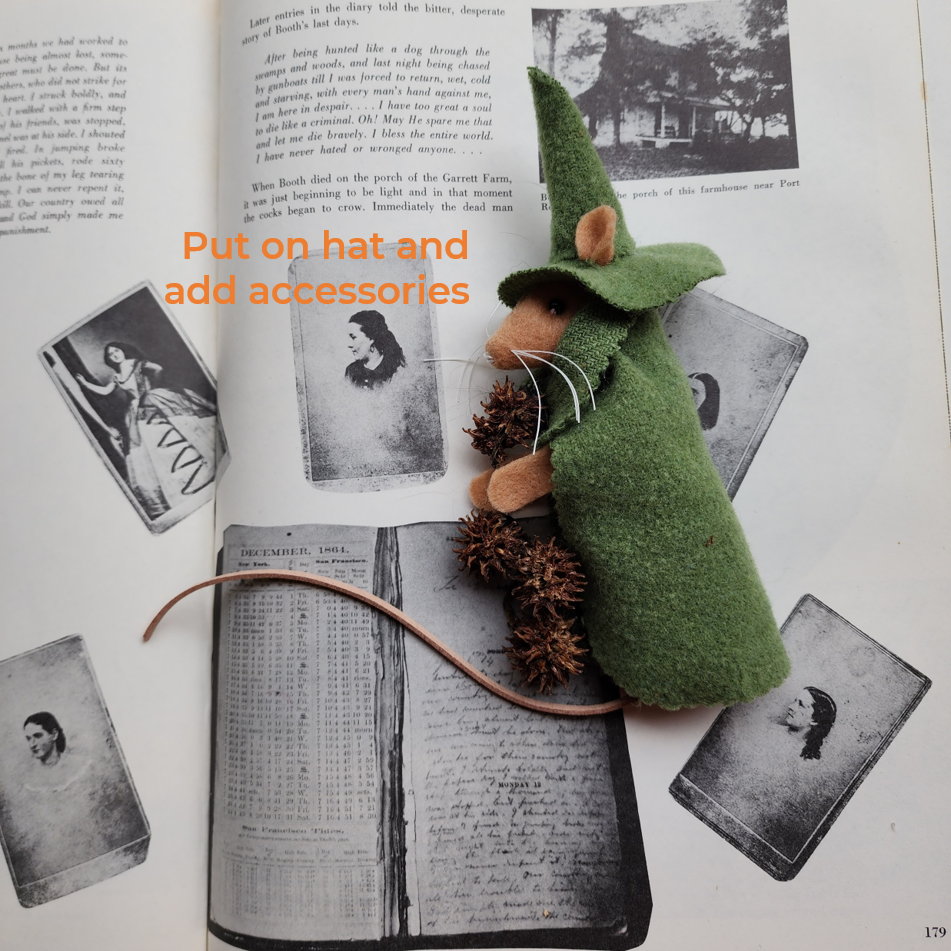
Wiggle the animal’s ears through the slits. The costume is done. Now you can add whatever accessories you like to complete the look.

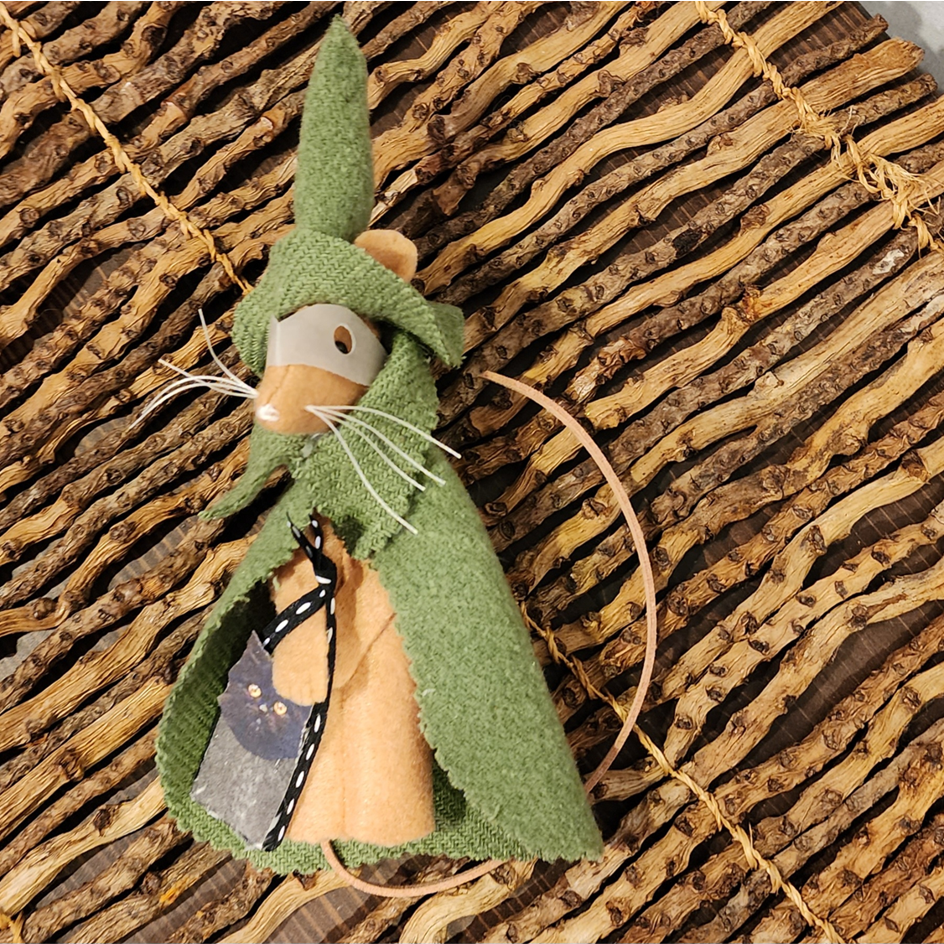
This little green witch has on her mask and her bag, ready for trick-or-treating.

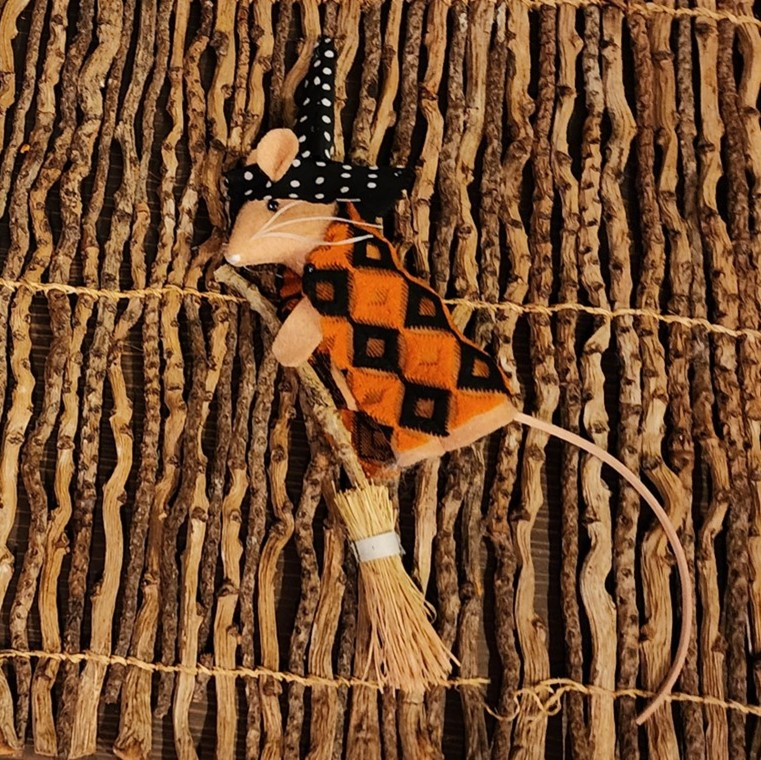
…and this little one is in traditional Halloween colors, ready to fly off on her broomstick for some holiday fun.

If you make a little witch, I love to see it!

Little Pumpkin Free Pattern – Beginner Sewing Project

Are you starting to learn to sew? Or are you looking for a quick and easy sewing project designed to boost pumpkin season fun? Here’s a simple, soft, squishy sewing project that will take you step-by-step through a set of skills for stitching toys.

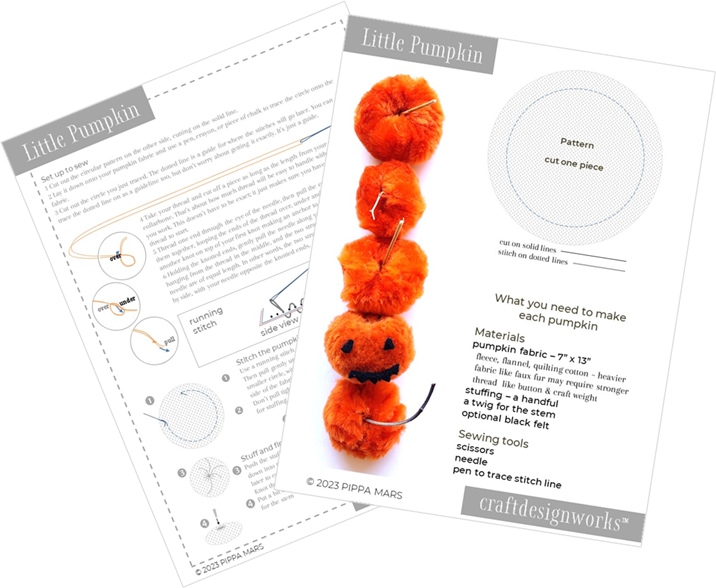
To get started, download the free pdf pattern from the craftdesignworks website. Scroll to the end of the post for the list of materials and tools you’ll need.

Round up some fabric to make your pumpkin. You just need a bit – a 7-inch square will be just right. I made the first pumpkins from some orange fake fur I’ve had around forever, but fleece would be perfect, quilting-weight cotton, part of a worn towel… Lots of options will work, and this is a great project for using up scraps. If you use a heavier fabric, like fake fur, using a heavier weight of thread will make stitching easiest.

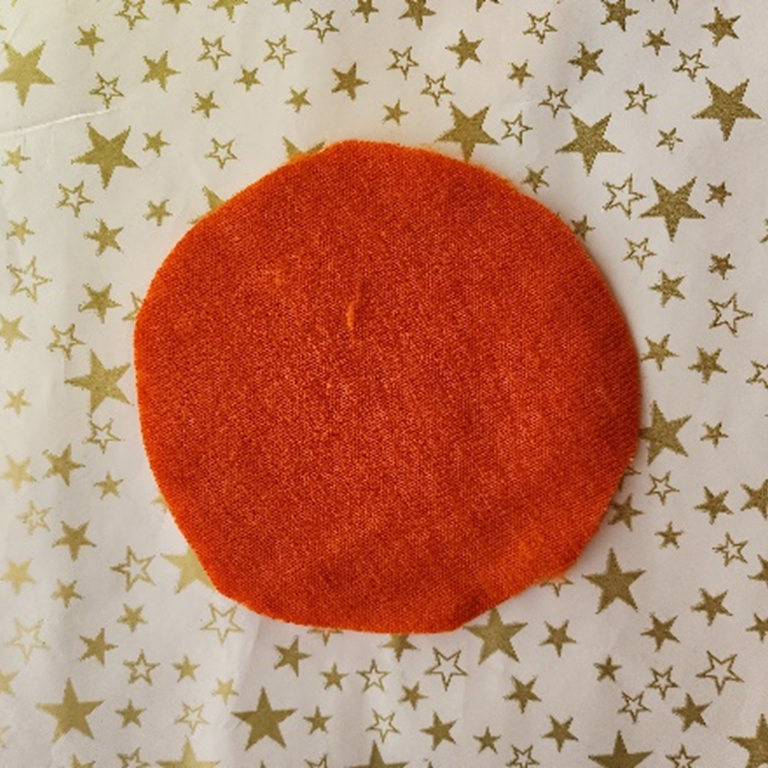
Cut out the paper circle pattern shape, put it on your fabric and trace around it with a pen, crayon, pencil, etc. The outer line on the pattern is the cutting line. Cut along that line.

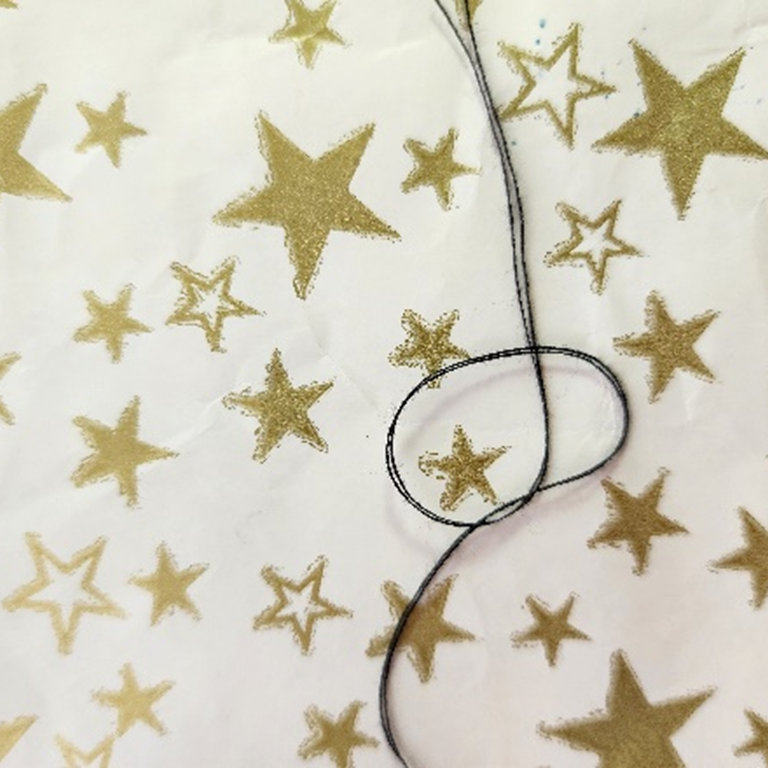
Cut off a piece of thread as long as the measurement from your palm to your collarbone. That’s about how much thread will be easy to handle without snarling as you work. It doesn’t have to be exact but will be a good start.

Thread one end through the eye of the needle, then pull the ends together and knot them together. Now you’re ready to start stitching.

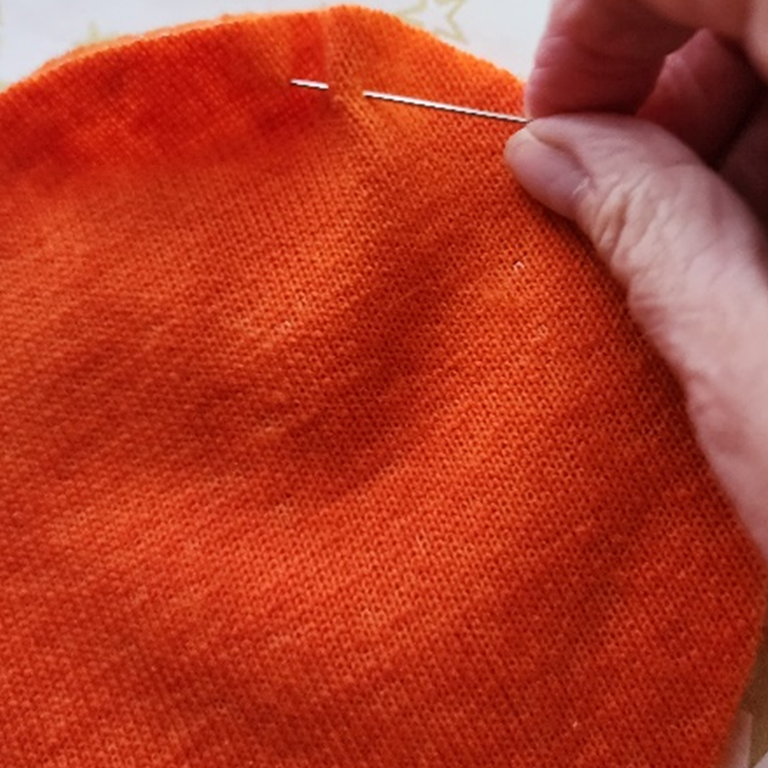
Using a running stitch, sew around the circle about half an inch from the edge. Again, it doesn’t have to be exact or perfect. As long as your stitching is a smidge away from the edge, it will be fine.

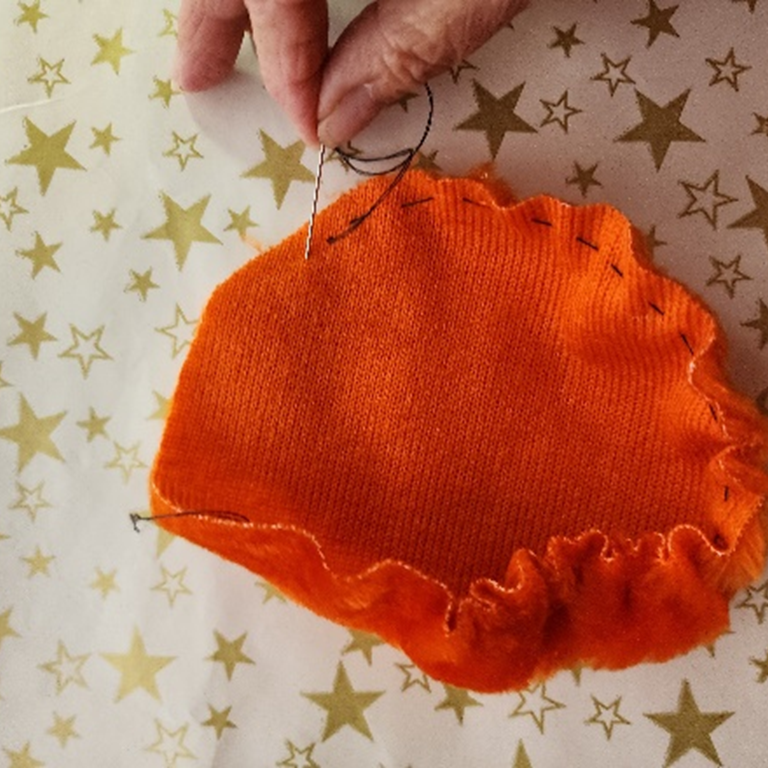
As you sew along, the fabric will start to gather up in a wiggly line. Perfect!

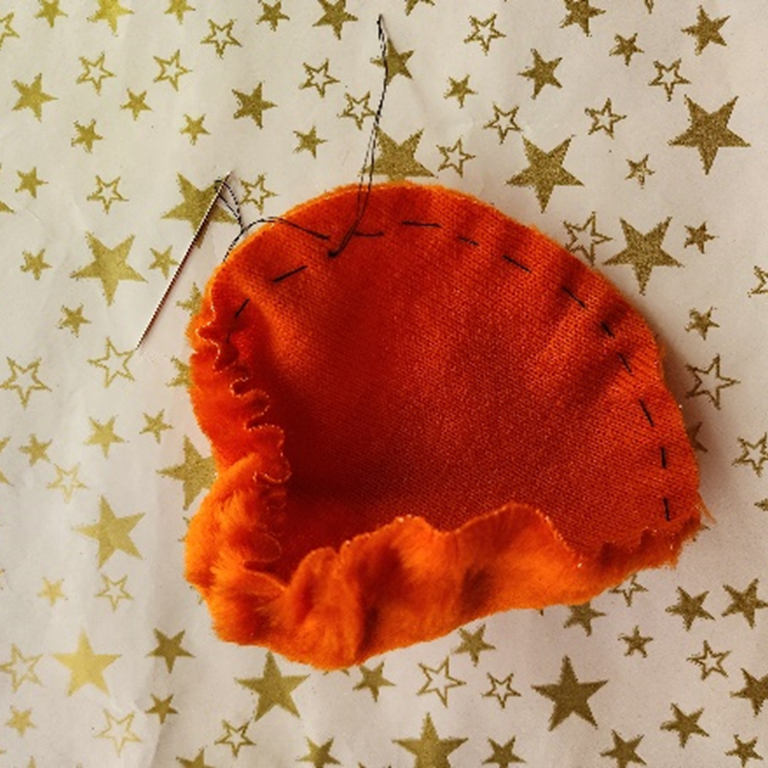
You can see it starting to gathering up into the pumpkin shape. Keep going around the circle until you get back to the starting knot.

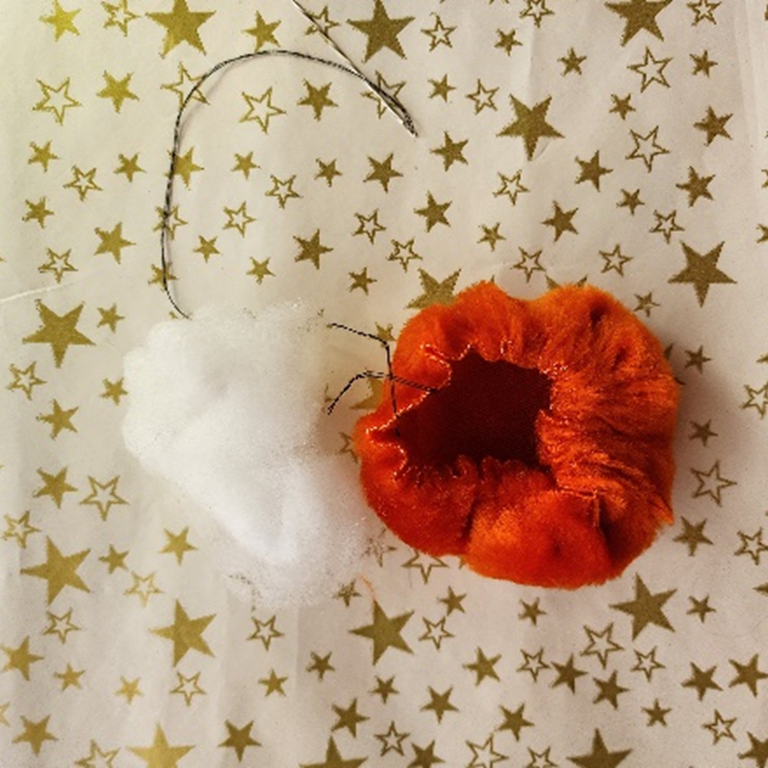
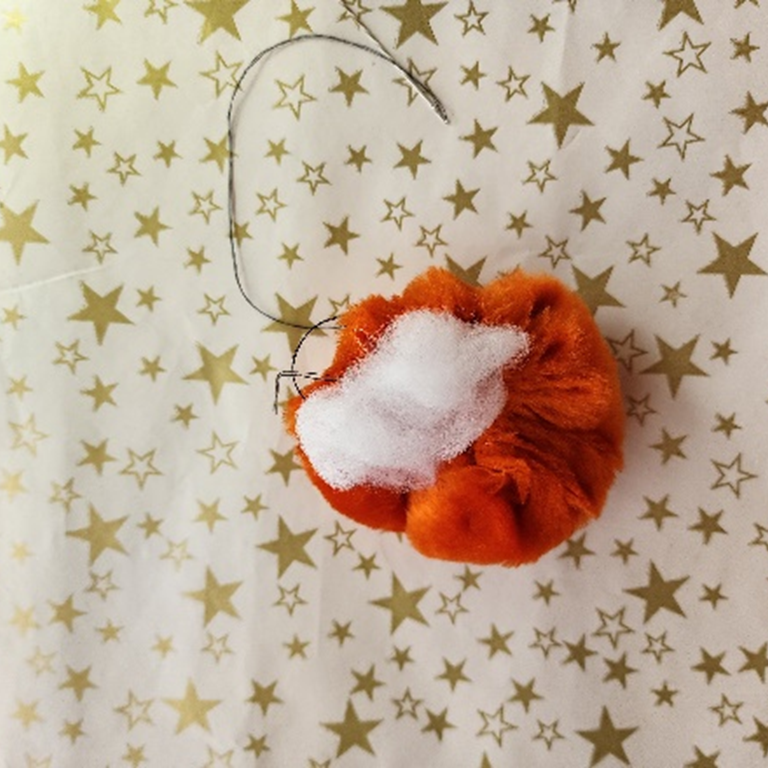
Pull on the thread coming from the needle until the pumpkin almost closes up, but leave a bit of an opening so there’s a space to push in stuffing.

Push the stuffing into that opening, making your pumpkin as squishy or as firm as you like.

Pull the gathers tight until the opening closes up, tucking the edges down into the middle of the pumpkin. Knot the thread ends right next to the edge of the closed hole with a secure knot. If it doesn’t close neatly, you can glue a leaf over if you want to cover anything untidy.

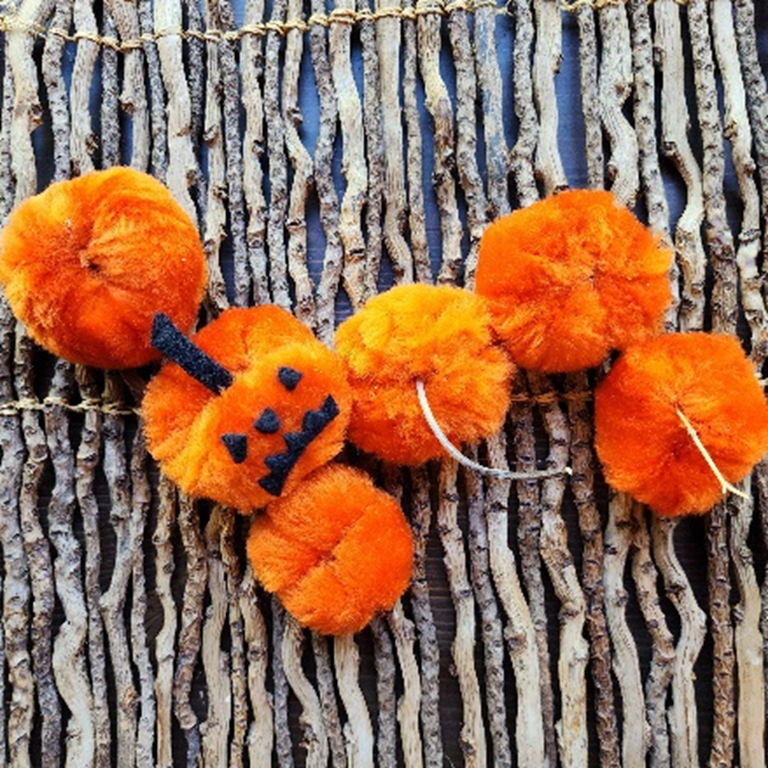
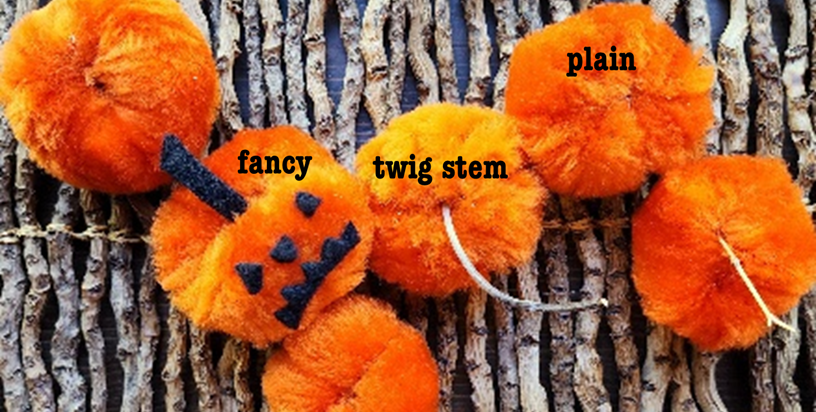
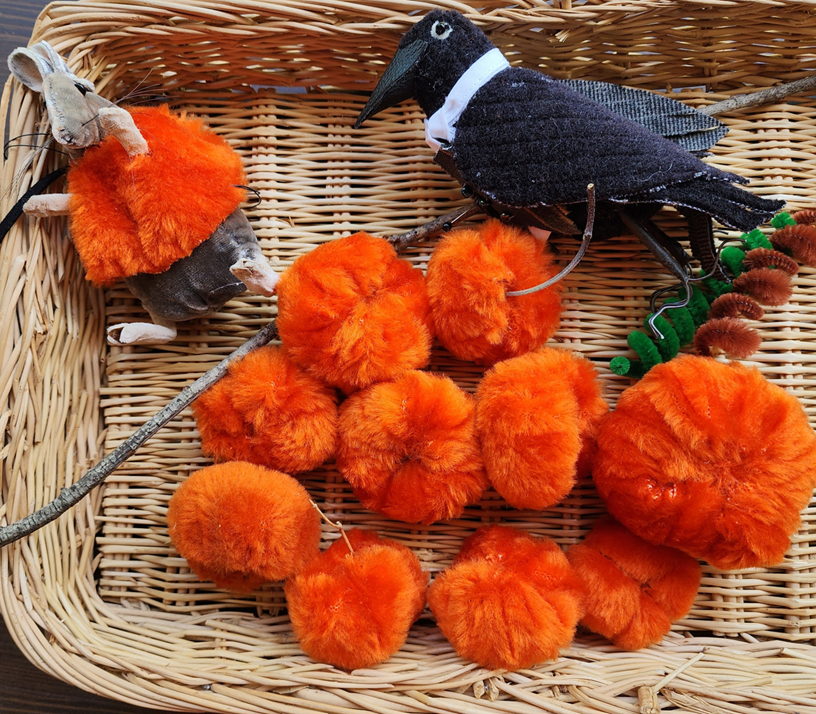
Tada! Your pumpkin is done. You can leave it plain, put a bit of glue on the end of your twig and poke it into the middle of your pumpkin, or fancify by gluing on little pieces of felt or other fabric. You could even get carried away, as I have, and end up with a pumpkin-patch-full of little pumpkins.

Of course they’re perfect for Halloween, but they would also be charming placeholder embellishments for the Thanksgiving table and other harvest celebrations.

I’d love to see pictures if you get inspired to sew little pumpkins!


Get the Little Pumpkin pattern download here

Materials

  • Pumpkin fabric – 7” x 7”: fleece, flannel, quilting cotton
  • Thread – heavier fabric like faux fur may require stronger thread like button & craft weight
  • Stuffing – a handful
  • Twig for the stem
  • Optional black felt

Sewing tools

  • Scissors
  • Needle
  • Pen to trace stitch line

I love to fail…3 tips for learning to embrace getting things wrong

I know, I know, every one of us is pressured to be perfect at everything right off the bat. Social media daily increases the pressures, as our ever-on access to the cameras in our ever-present phones has spawned legions of carefully posed photos of satisfyingly arranged meals, craft projects, travel moments, outfits, gardens, kitchens, studios (and on and on and on). Our minds are full of images of the way things are “supposed to be”. Is it any wonder that more and more humans are becoming sad and depressed?

Who can live up to this onslaught of visions formerly only available in magazines and tv that now invade our brains every day? All these visions of perfection intersect malignantly with imposter syndrome, especially trying for those of us who venture into creative endeavors. How can anything I ever create be worthy when there is so much visible worthiness everywhere?

Enter reality.

Yes creativity is fun, flowing, delicious. It’s also hard, frustrating, and elusive. Finally a few brave souls are sharing actual process content. And I want to join them. I want to share the too-often-hidden view of a very messy, imperfect and enthralling creative process.

Whatever it is that governs our judgment of the success or failure of each of our unique expressions is both friend and foe. Can I detail what it is that I love about another persons work? Of course! And can I detail what it is that I don’t like? It’s rare that I find even my most cherished role models have no work I don’t admire. So there it is, evidence of my own individual expression at work. That’s the thing that lets me know my own work doesn’t yet satisfy me. That’s what makes me fail. And that’s what ultimately leads to my successes.

My process starts with a visual idea. Sometimes I can capture the idea in a quick sketch. Other times even that much impossible. The inspiration is too vague. All I can do is start trying. I wish I could predict how many iterations it takes me to get to satisfaction. At least 5. That means at least 4 failures before I reach the promised land. Sometimes the failures mount up into the hundreds when I go on for years, unsatisfied by what I’ve made. Sometimes I meet up with dead ends, my desire to pursue an idea exhausted before I’m ready to finally give up.

Along the way, I take heart from wise words from wise mentors. There is value I can find in the work I’ve made that I don’t like and in the envy I feel when looking at another’s proficient expressions (which is, after all, a failure of confidence on my part).

Tip One

Emma Carlisle is an artist and teacher who generously shares process work on instagram @emmacarlise Her approach when she doesn’t like her work is liberating:.

…to harvest value from failed work

  • Find 3 things about the work that you DO like.
  • Then move on, harvesting your knowledge of what you like into your ongoing work.

Tip Two

In a similar vein, artist and agent Lilla Rogers has an empowering way to navigate envy. Are there people whose work incites your envy? What is it that you like about their work? That’s a message from your unique expression.

…to harvest envy of the work of others:

  • Make a list of people you admire.
  • For each one, capture what you value in their work.
  • And, if possible, capture what you don’t like.
  • Where would you differentiate from their vision?
  • There’s a set of clues for understanding what you value and what you want to avoid.

Tip Three

And here’s my personal trick for creating a defense against both imposter syndrome and stuck places:

  • From that list of people whose work I admire, I work to very precisely define each attribute that attracts me to the work
  • …and create a physical document from the list
  • This becomes a personal style guide, or manifesto, to remind me of the potential areas I can explore.
  • When I’m overwhelmed by failure or imposter syndrome, I can always go back to that manifesto and find inspiration for a new thing to try.

…so, I love to fail…

Failure gives me the opportunity to embrace reality. Failure gives me the opportunity to test my courage. Failure gives me the opportunity to test my perseverance. Failure shows the way to next steps. Failure gives me the opportunity to return to hope. And failure gives me yet another chance to move forward.

“…pick yourself up, dust yourself off, and start all over again…”

3 Ways to Harness the Power of the V&A Digital Collections: Infinite Inspiration? Quite Possibly!
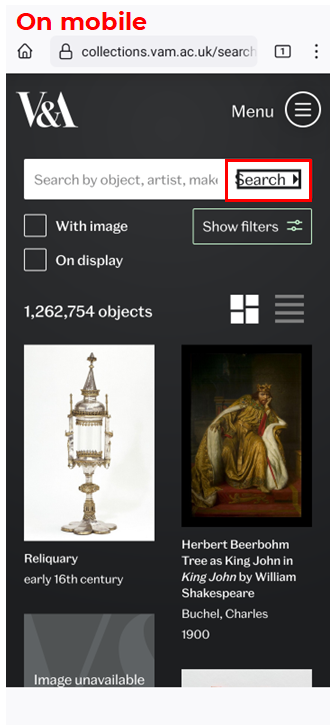
Now you can dive into the deep pool of the Victoria and Albert Museum’s online collections and own this superpower whenever you want a spark of inspiration.

If you’ve ever visited the museum in person, you already know the pleasure of browsing around the “family of art, design and performance museums, where everyone is invited to enjoy the power of creativity.” If you haven’t yet had the pleasure, you won’t regret the time invested in beginning to explore the V&A Digital Collections–inspiration at your fingertips.

This post will arm you with the basics of how to bring this intense treasure chest of art, craft and culture to your desktop or phone.

It all starts with the home page at vam.ac.uk. At the time of this writing, the Diva exhibition is making the home page navigation a bit hard to read, but you can find the Collections button in the top navigation bar, or in the three-bar menu on mobile.

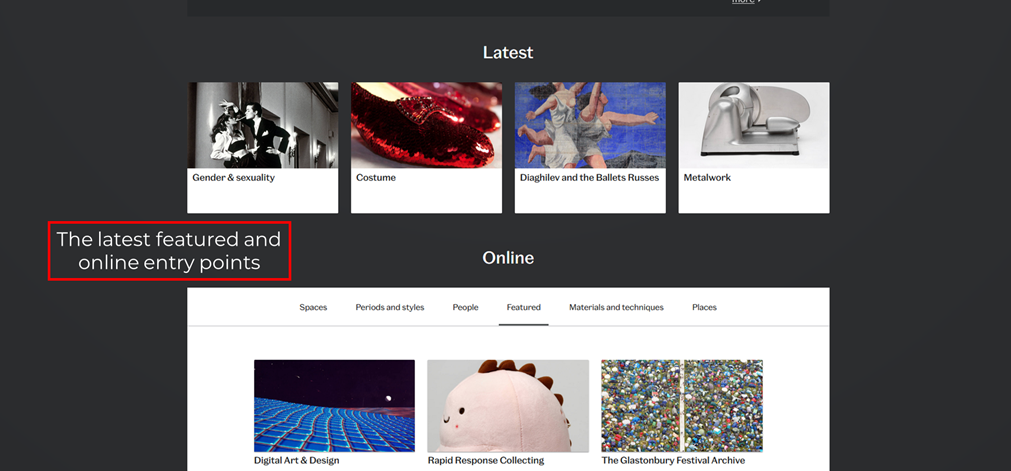
The Collections button will take you to the main Collections page. Scroll down to see currently featured categories.

There are 2 main ways to proceed from here: via the search function or using filters.

1 – Using the Search function

Let’s start by going back up into the search bar and entering a topic of interest. As a fabric geek, I’ll look for textiles.

That’s a pretty broad search term. I can see by the text below the search box that I’ve chosen to look for a category defined in the system. To further focus your search, you could add additional keywords to your search term.

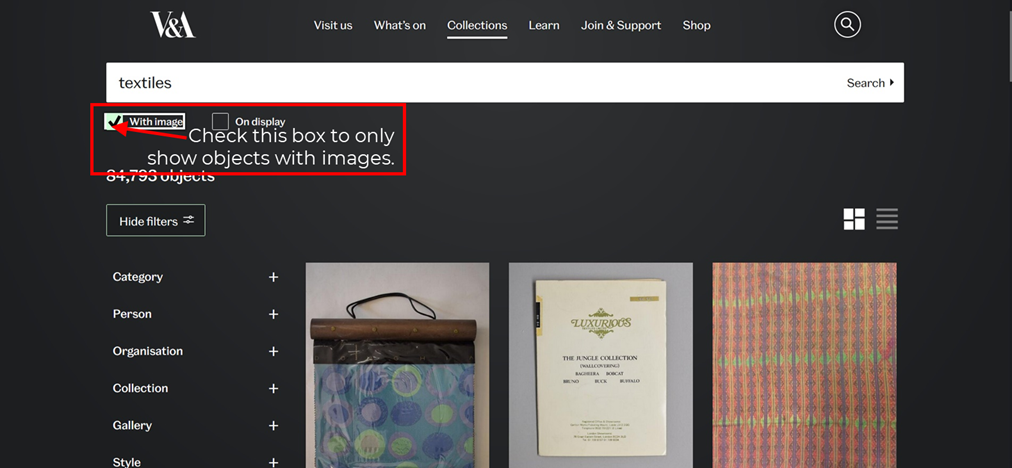
But as an example, let’s follow this path to the endpoint. The next option will be whether you want all the results, see only objects currently on display, or narrow choices to only show the objects that have images. That’s the one I normally choose.

Now I can visually scroll through the objects in the collection.

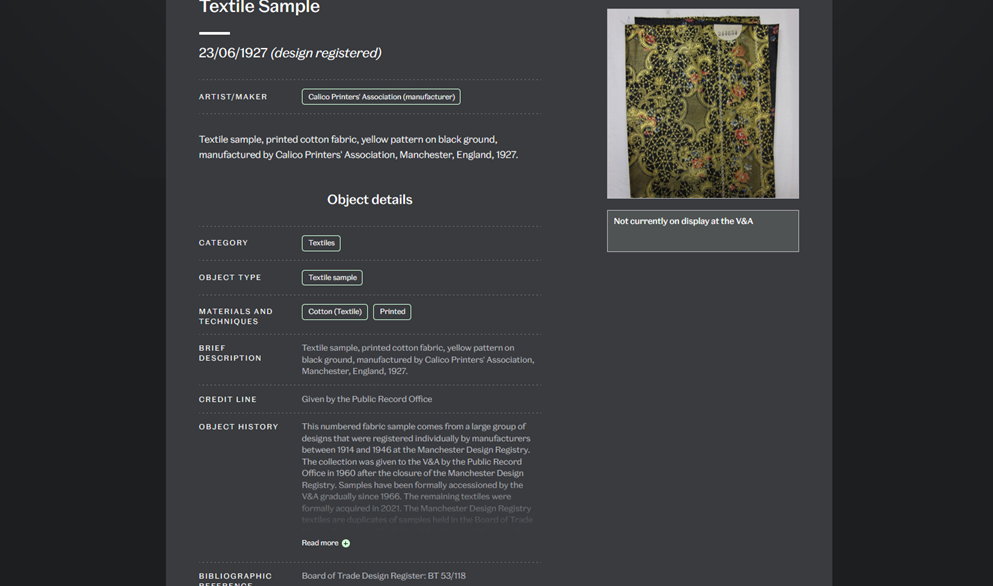
The brief label information displays the fabric’s date and manufacturer. Clicking on the image brings up the swatch with full details about this swatch visible by scrolling down the page.

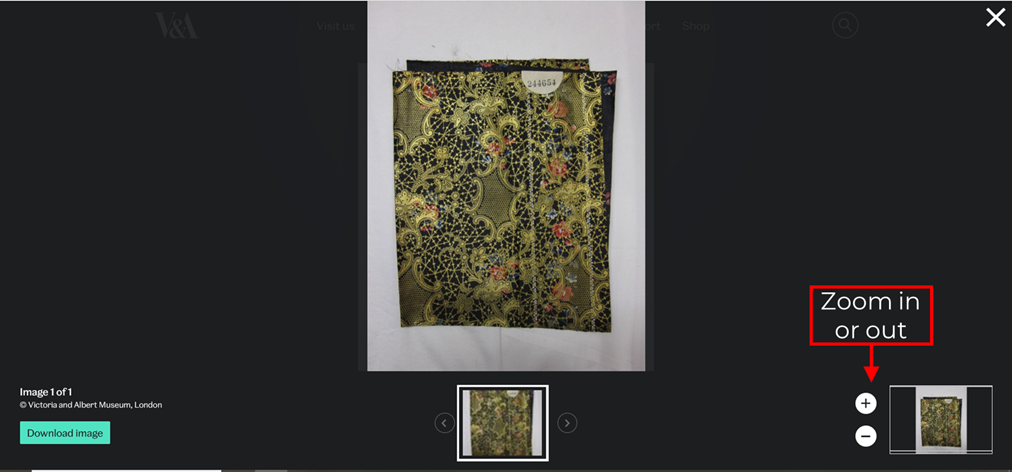
To look at the object more closely, scroll back up to the top of the object page to use the + or – controls to zoom in or out. On mobile, you’ll need to click the object in order to zoom in and out or download.

Here’s the enlarged detail:

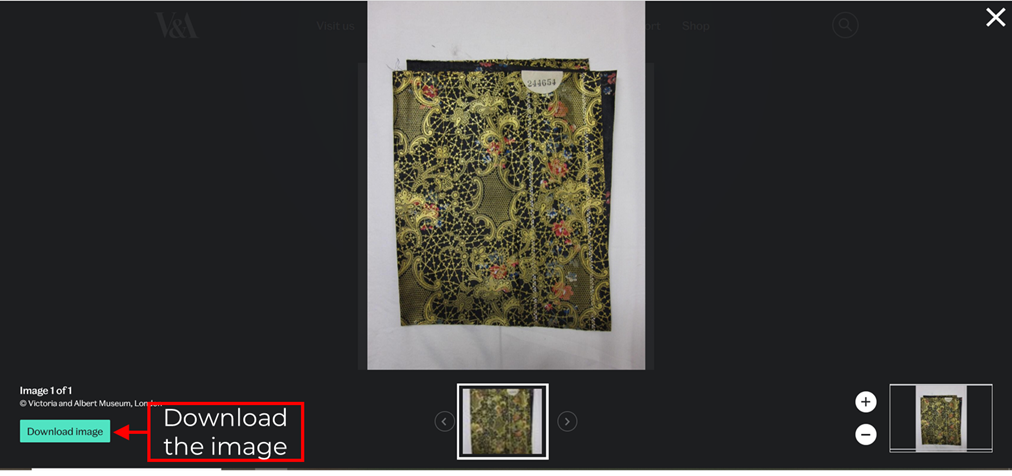
At any level of detail, you can choose to download an image.

You’ll be able to see the exact terms of use for images in the collection and give your agreement. If the image requires licensing, the button will say “License image” instead of download, and the resulting popup will include instructions on how to proceed.

Now that you’ve seen the basics of using the Search tool, it’s time for the other powerful way to access objects in the collection: using the filter options in the left navigation rail.

2 – Browsing with filters.

Scroll back up to the top of the page and click the Collections tab. Click the Search button with nothing in the Search window.

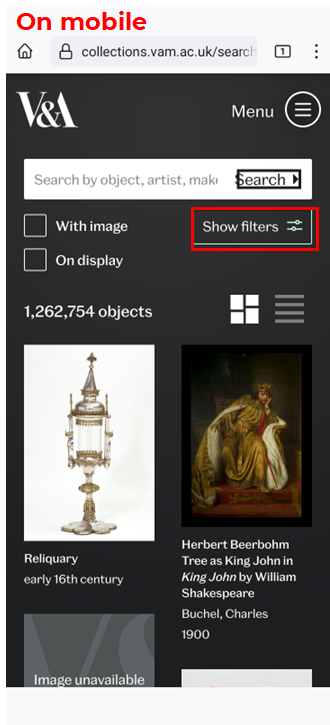
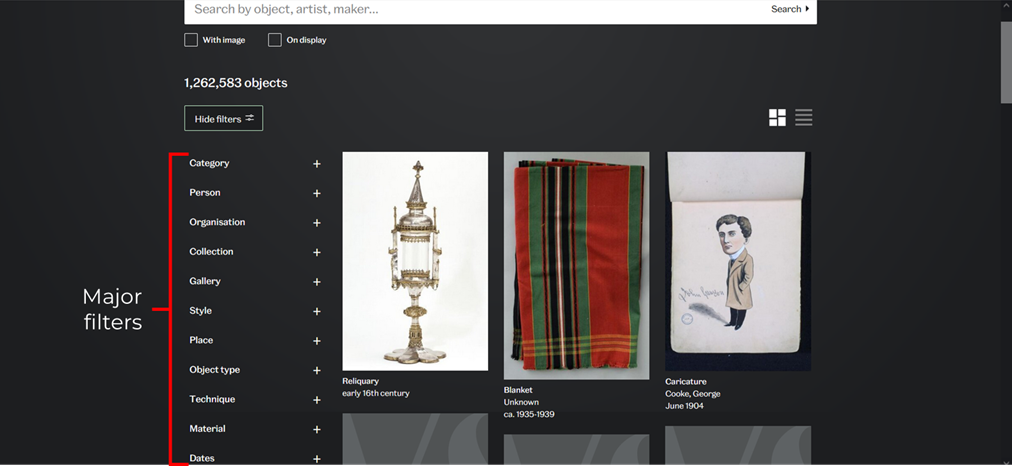
…which will result in offering you all the objects in the collections, with a list of the filters you can use in the left navigation bar. On mobile, click “Show filters” in the top right to bring up this list.

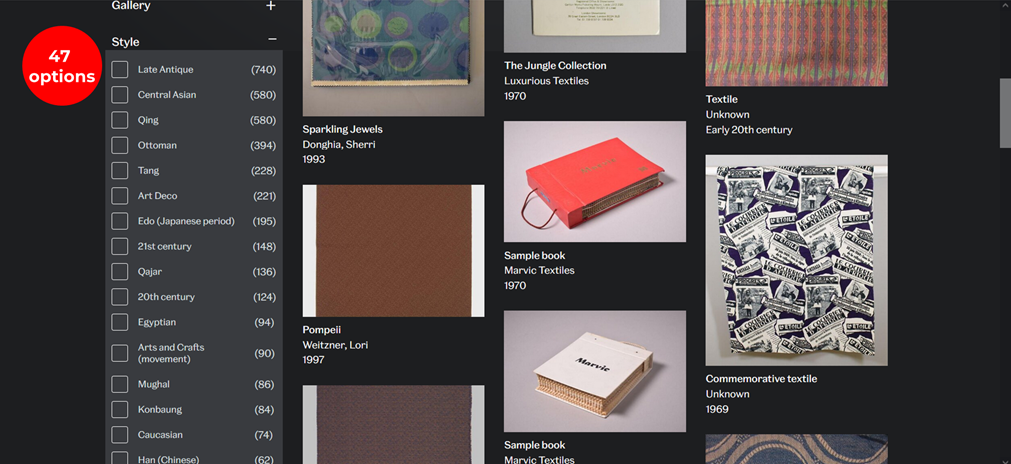
Over a million objects in the collection! The + (plus sign) to the right of each filter will pull up a list of options.

The style filter has 47 options, for example. And you can choose multiple filters to refine what you’d like to see.

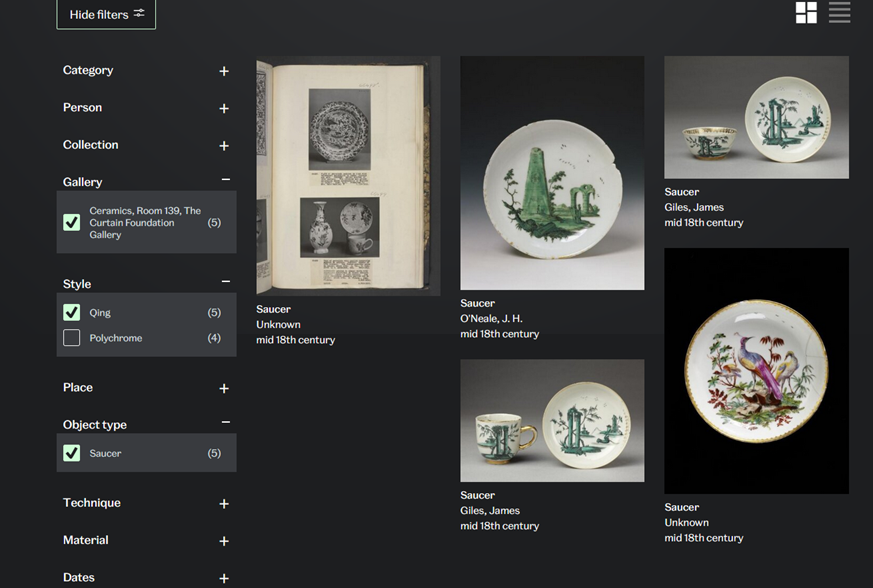
This result has 3 filters applied to show only Qing dynasty saucers from Ceramics Room 139, The Curtain Foundation Gallery:

You can see how powerful the filters can be.

The third way to access the digital collections is to combine methods 1 and 2.

3 – Combining search and filters

It’s straightforward–just start with a search term and then choose the filters you want to apply to the result.

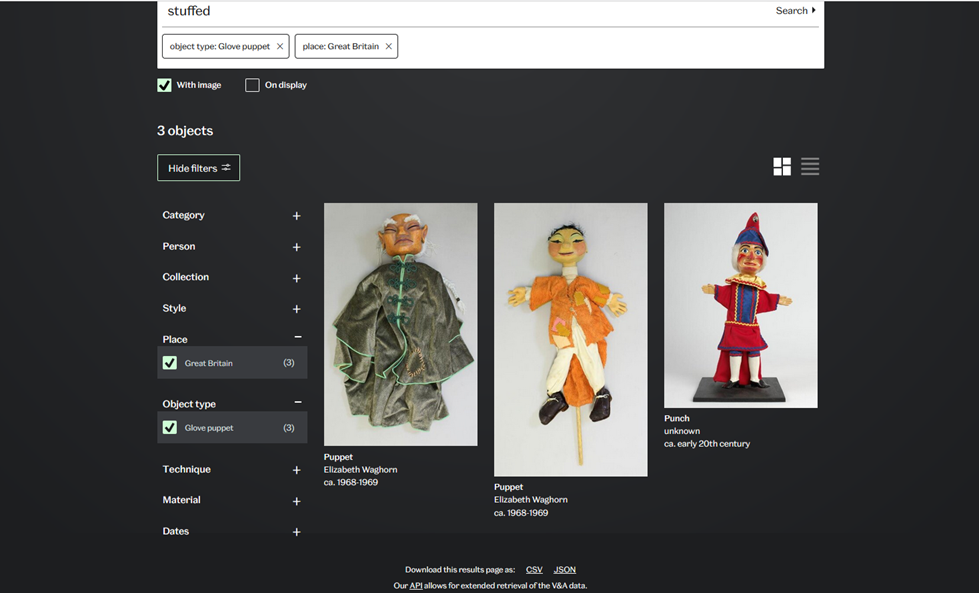
Here, I started with a search for “stuffed” and then applied filters for glove puppets from Great Britain:

So that’s all there is to it. Easy, right? Three powerful ways to get into the digital collections and find treasures to spark your creativity–I hope you’ll try them. If you’re interested in learning more about the kind of thinking and planning that goes on behind the scenes in continuing efforts to make the vast collection accessible, here’s a great read.

Please let me know if you have any special objects to share, or other museums whose digital collections you appreciate. Happy hunting!

Summer Reading: Fixated on Martin Salisbury

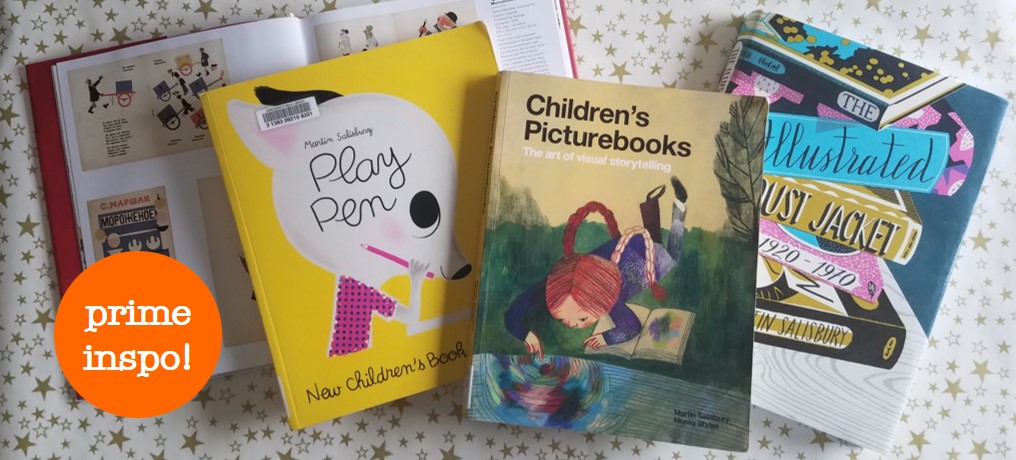
Here’s a different kind of beach read for anyone who enjoys visual inspiration and just plain great graphics. I started reading this book, one page at a time, as we packed up to move from San Francisco. I loved it. Then it disappeared. Only recently I finally found the box of books where this beloved tome was hiding:


100 Great Childrens’ Picturebooks. “This unashamed visual feast celebrates the best designed and illustrated picturebooks from around the world over the past one hundred years”. Working chronologically from the earliest color-illustrated books for children, this book works its way across time and around the world, including Russian Constructivists, Italian Futurists, Postwar Neo-romantics and so much more. It’s fascinating to follow the changes in what was offered to children and to learn more about the illustrators. The introduction promises. it will be “fearlessly confronting the frontiers between a child’s picturebook and art, this is a collection of books that anyone with an interest in design, illustration, or simply children’s literature should know about.” Sweet, spicy, challenging, it’s all here. Gotta love it!

…and once I got started on Martin Salisbury I just couldn’t stop. I’m pigging out on 3 more titles our beloved library lets me enjoy:


Play Pen by Martin Salisbury is focused on contemporary children’s book illustrations, recognizing that the visual world children live in today is full of movies, cartoons, tv, video games, etc. Each illustrator gets 4 pages, showcasing a variety of their works, and including some of their own words about their experiences and approaches to illustration.
Children’s Picture Books, the Art of Visual Storytelling  by Martin Salisbury. This is a thought-provoking, deep inquiry into the industry, concepts, practices and techniques that contribute to the creation of the picturebook. And, of course, it’s visually rewarding.
The Illustrated Dust Jacket 1920-1970 by Martin Salisbury. And then veering off from children’s material altogether, this is a compendium of graphic design for book covers from both sides of the Atlantic. Organized alphabetically by illustrators’ last names, it includes both famous and lesser-known artists and discusses both their works and their lives. Another visual feast.

I’m recommending these all as summer reads because I can so easily imagine lounging in a hammock or outdoor chair and  just picking any page or two at random to inspire delicious daydreams.

Vintage Toy Week 2023

So much fun! As an appreciative follower of the instagram community of childrens’s book illustrators, I sometimes join in their community challenges. And that’s what happened with #vintagetoyweek2023.

This gathering of creative expression was hosted by a group of very kind, talented and generous illustrators: @mosokje, @seba.ilabaca, @clairefletcherillustration, @mollymccammon_, @marinahenina, @sudden.strangeness, @margrete_lamond, @benjamin_pollocks_toyshop. They represent a range of illustration styles from around the world. Definitely worth exploring!

There were 7 days of prompts, based on different vintage toys. I’m not an illustrator, but I greatly enjoy responding to challenge prompts by creating scenes with toys I’ve made and toys from my collection. So here’s what I came up with:

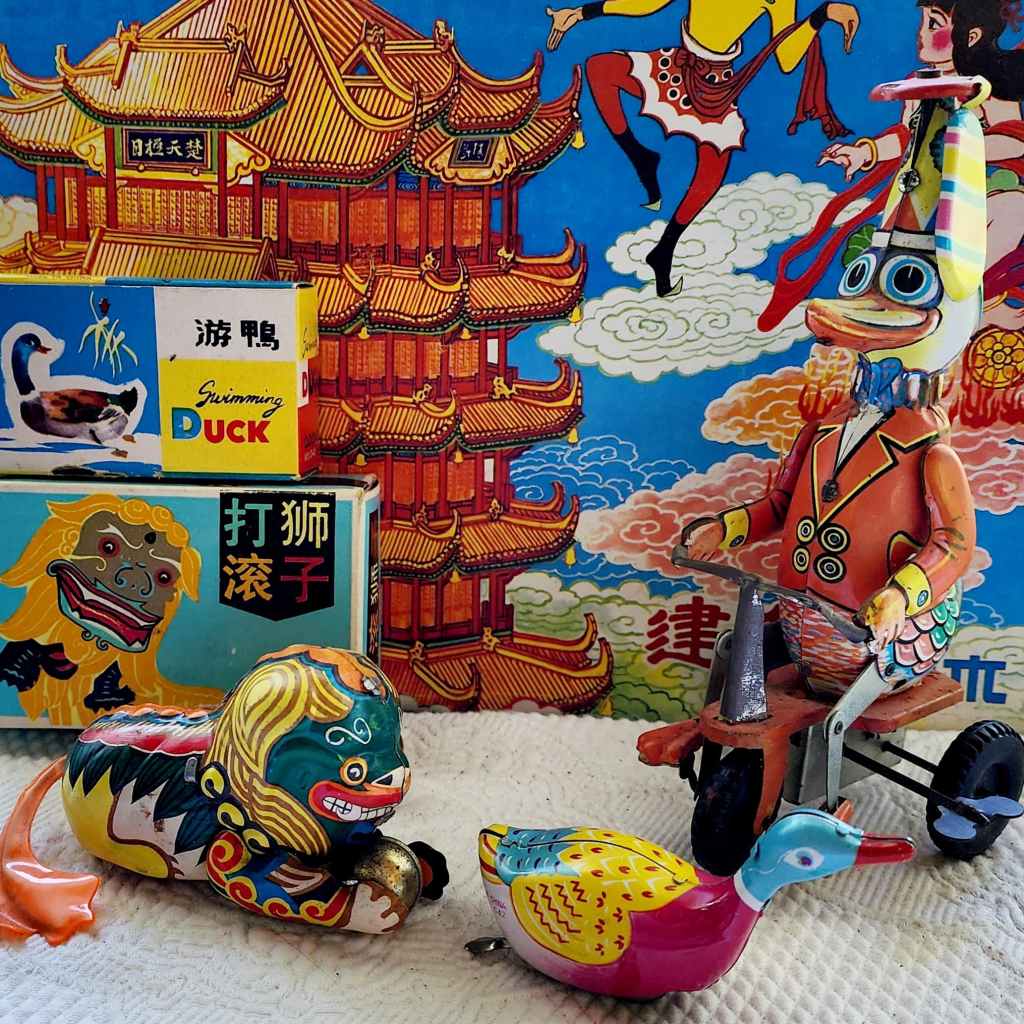
Day 1 – Tin Toys.

Here are a fu dog that rolls and flips, a dry-land “swimming” duck, and the goofy duck-billed clown trike-rider. That one was a 40th birthday gift from a dear friend. I need to try to see if I can get the tricycle to go again if I oil it.

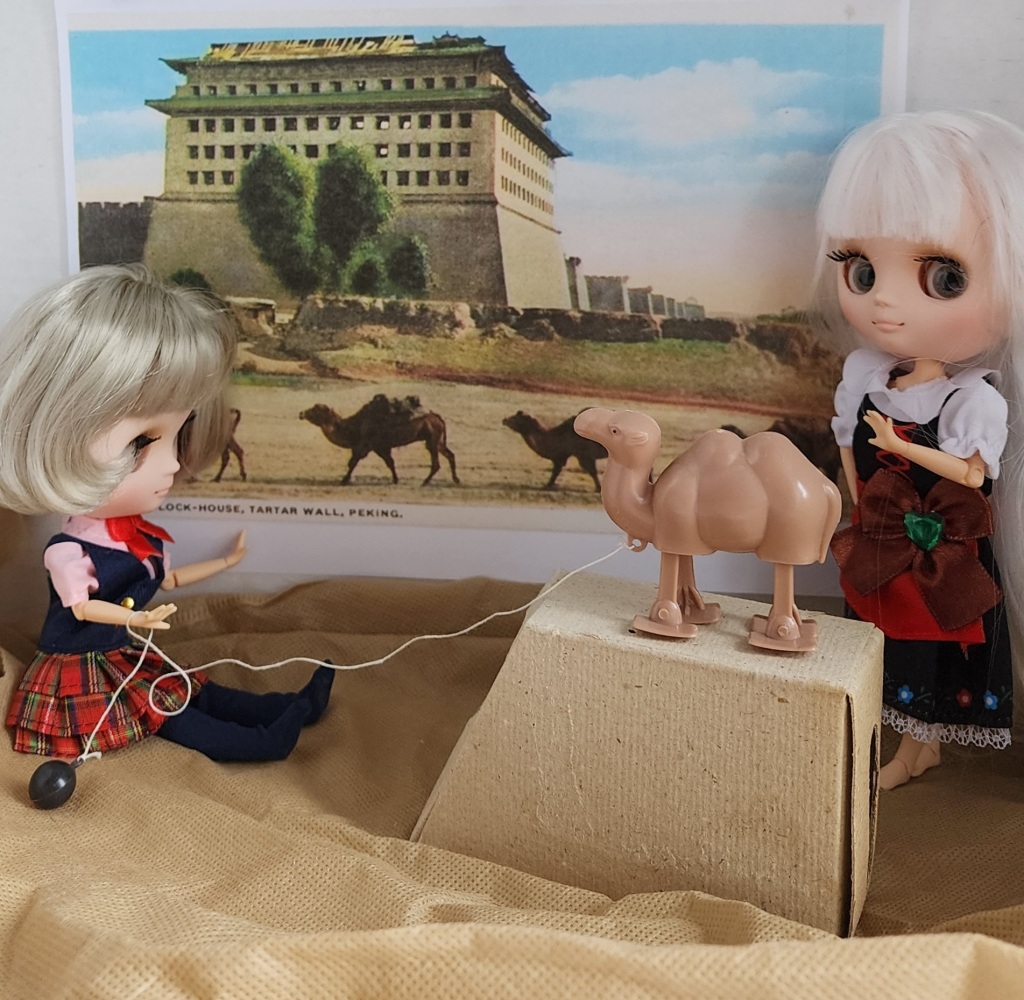
Day 2 – Ramp Walker.

“Why won’t it walk anymore?”
“I don’t know, but sometimes vintage toys are like that. But we still have a camel and we can still play camel train!”
This one is not exactly a ramp walker, but a “magic” camel who used to walk up to the edge of a table and magically stop. Sadly, it no longer walks. I’m just starting to play around with the Blythe dolls who joined my toy family last year, and they brought a charming liveliness to this pic.

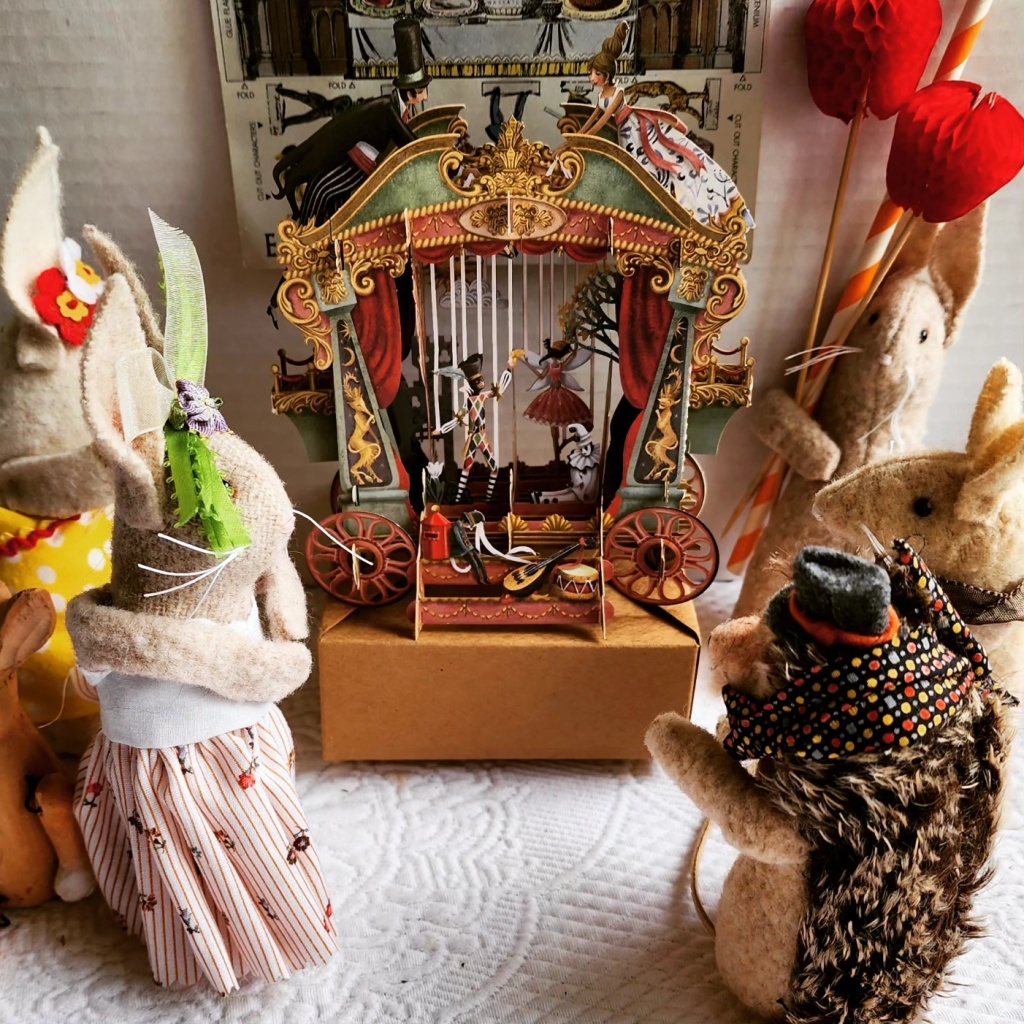
Day 3 – Marionette.

“A magical traveling marionette theater, making a show for us.”
“I see Harlequin!”
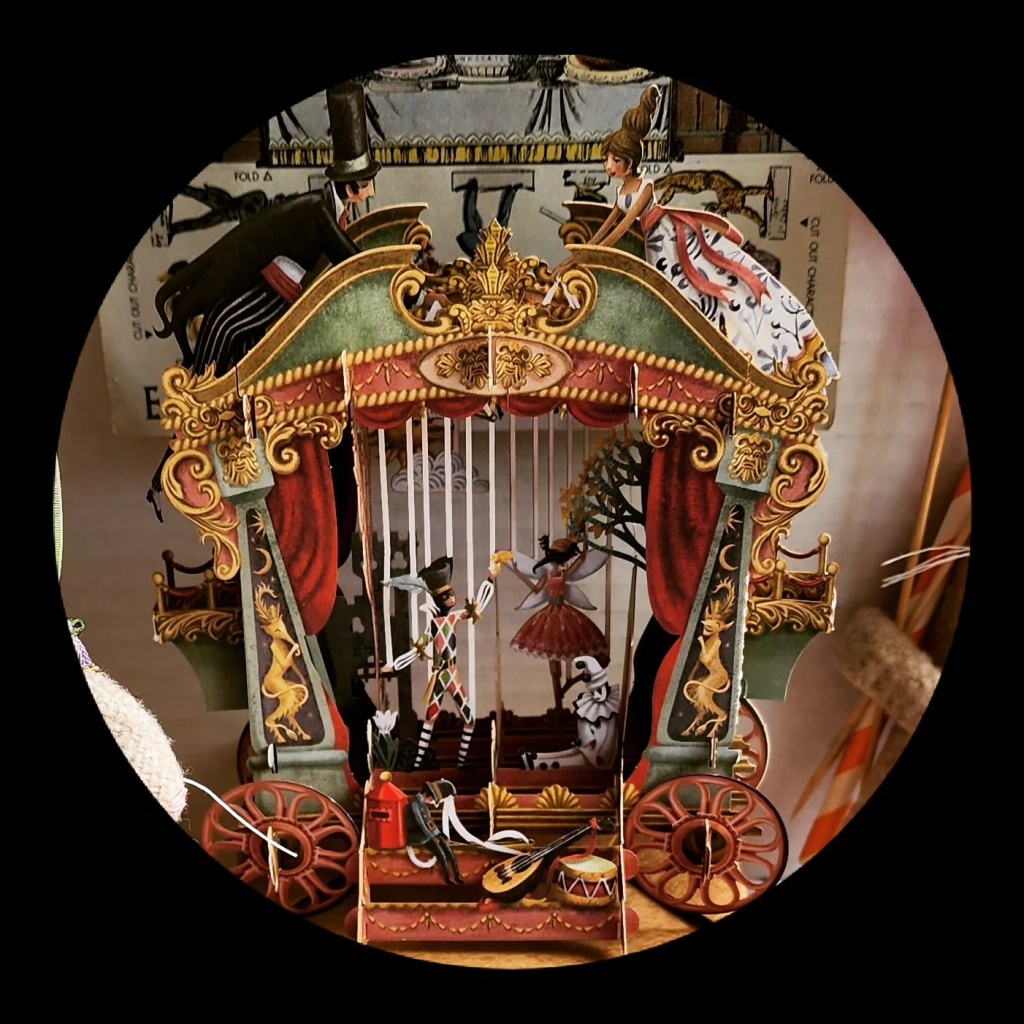
This one was a bit of a struggle for me. Of course I have a variety of puppets in my collection, but I couldn’t make anything work with the larger marionettes. Then I remembered that I had this intricate and beautiful paper pop-up card , a miniature traveling marionette theater that I had ordered by mail from Benjamin Pollock’s Toy Shop (@benjamin_pollocks_toyshop) in London, and it all fell into place. A meta performance of puppet theater for an audience of my little handmade American puppets and characters.

A closer look at the beautiful card.

Day 4 – Circus.

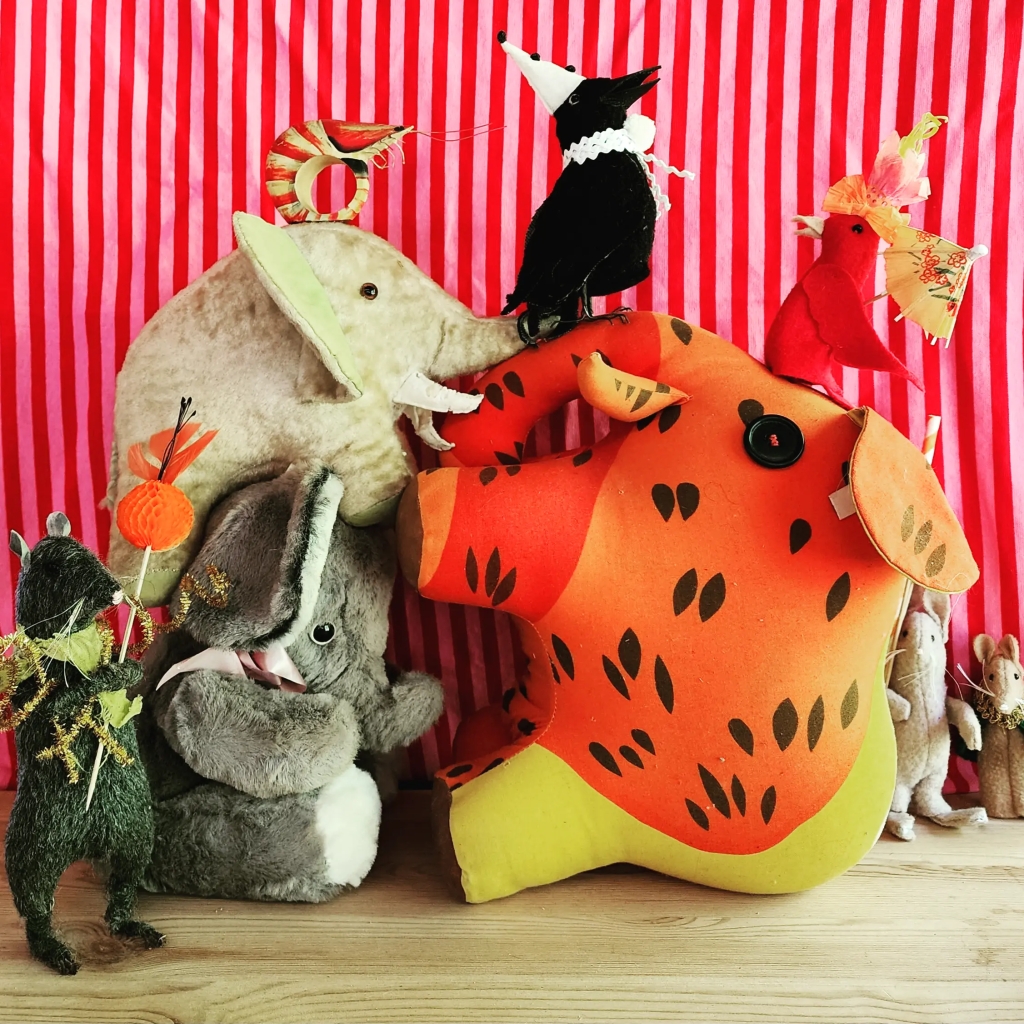
“Never before seen act of daring, gravity-defying cooperation. 3 elephants, 2 birds AND a crayfish. Circus feat brought to you by #vintagetoyweek2023.” I hadn’t realized I have 3 elephants in my collection until I went hunting for circus animals. The crayfish had been waiting by my kitchen table, hoping to join the fun, and found its rightful place atop the elephants.

Day 5 – Celluloid.

“So much celluloid! So much crochet! So many travel souvenirs! All appearing for #vintagetoyweek2023. Kind of creepy how some of their “sleeping” eyes are still working while others are happily staring off into space.”

This one was quite a challenge. Despite my love of toys, the only celluloid in my collections was in the form of small dolls and doll faces. I have a weakness for them and can never leave them in the wild, as I worry about their ultimate fates if I don’t “adopt” them. I was thinking Busby Berkeley as I arranged them together.

Day 6 – Jumping Jack.

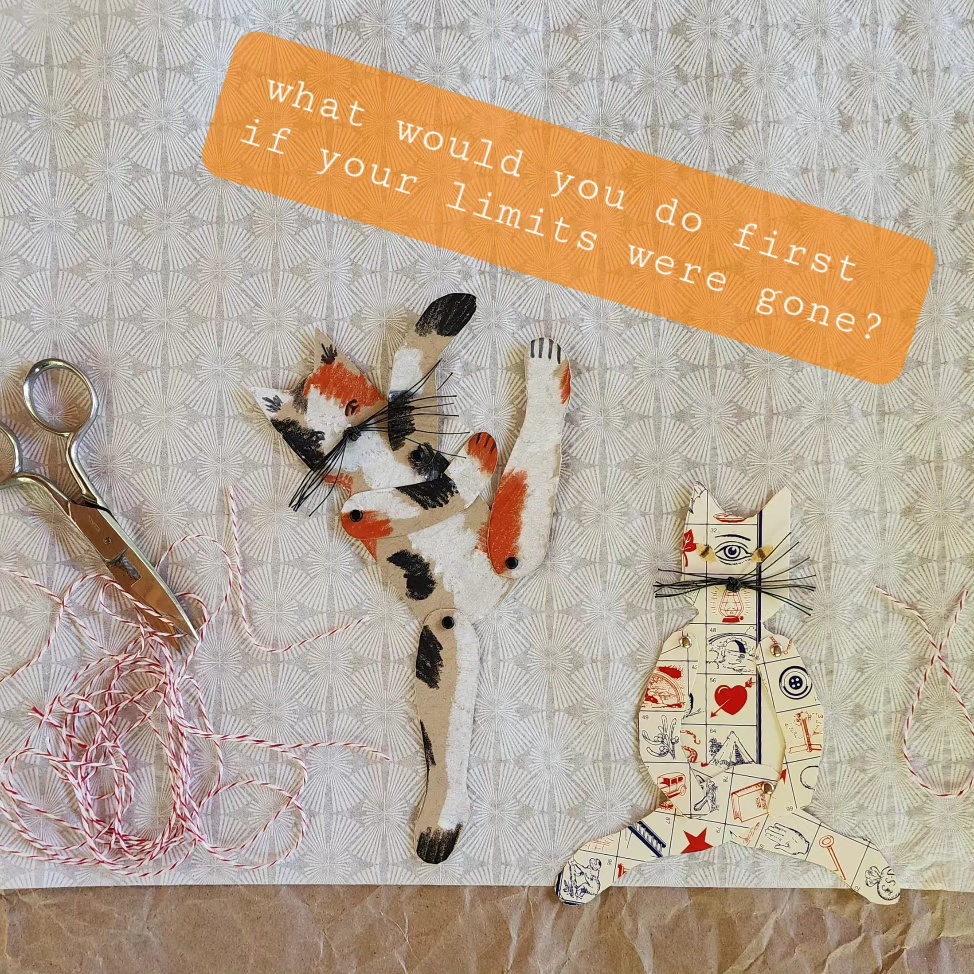
“Would you dance a dance you’d only dreamed of? Or finally be free to meditate, untethered from everyday constraints? #vintagetoyweek2023 says today is for jumping jacks, and mine want no strings.”

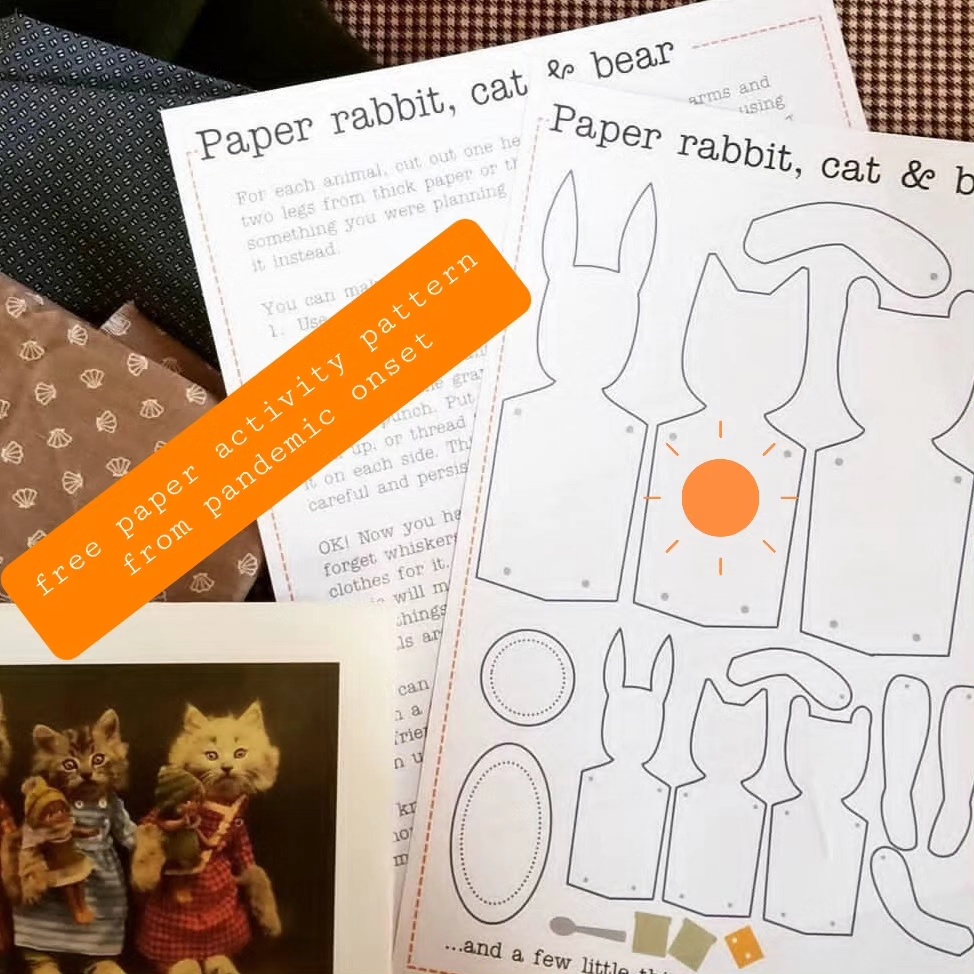
(Not really vintage, or jumping jacks, these were made from a free paper activity pattern I offered at pandemic onset. If you know someone who would like to make some paper cats, rabbits, or bears, link is here.)

Day 7 – Skittles.

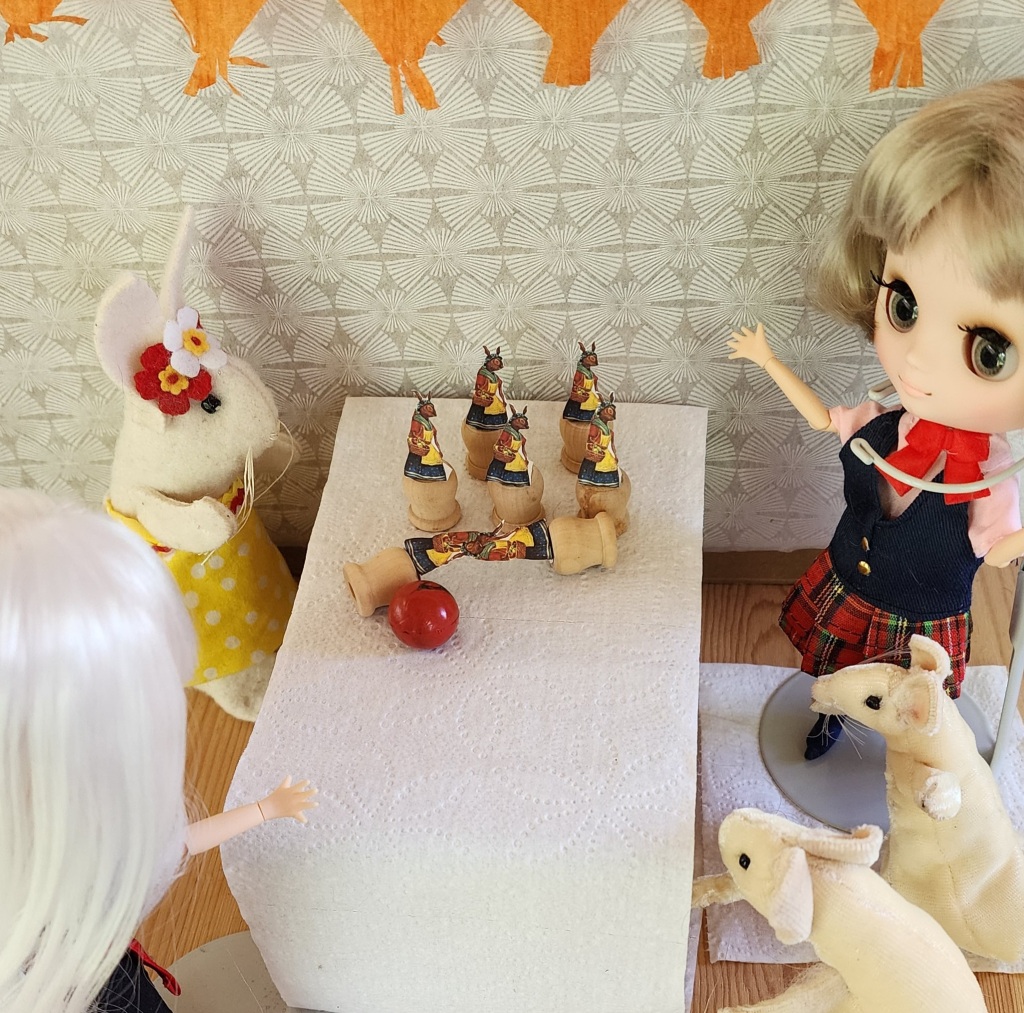
“The competition is fierce, but everyone is having fun playing rabbit skittles.”

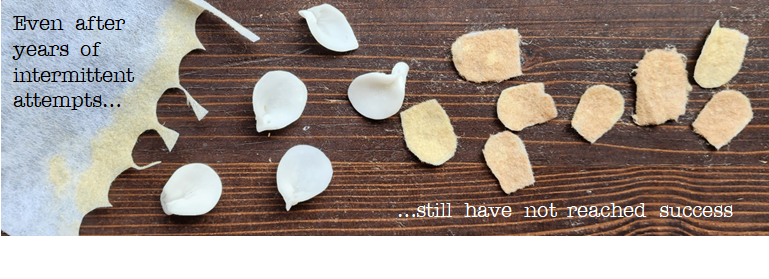
I have NO skittles or anything like skittles among all my toys, so I ended up making a set of mini rabbit skittles based on a 1906 set by Steiff. I’ve always coveted those Steiff skittles! I’m still learning how to hold up and pose the Blythe dolls, so a visible older doll stand helped with this picture. Also, the white velvet mice in the lower corner, 2 failed samples, contributed just the right audience note to the scene.


Vintage Toy Week 2023

If you haven’t yet joined in an instagram challenge like this one, but think you might like to try, please do! As the week goes on and you’re surrounded by a friendly, supportive community who encourage each other’s efforts, it’s a nourishing experience. Check out the hosts’ accounts and the hashtag #vintagetoyweek2023 to look over the fun. Maybe I’ll see you there next year!

A final thank you to the hosts for opening a space where we all could play and inspire each other:
@mosokje
@seba.ilabaca
@clairefletcherillustration
@mollymccammon_
@marinahenina
@sudden.strangeness
@margrete_lamond
@benjamin_pollocks_toysh
op

…til we meet again…

Rags to Riches Upcycling Summit 2023: Hope for the Future!

I had an absolutely delicious and nourishing online experience in May, remotely attending the Rags to Riches Upcyling Summit. It was the second year for the event, organized by the Stitcherhood, a community founded by Crispina ffrench. Crispina has been working in upcycling since the 70s, making garments, blankets and creatures from discarded textiles.

The Stitcherhood is “a community of textile upcycling entrepreneurs who share a passion for addressing global textile waste with creative reuse.”

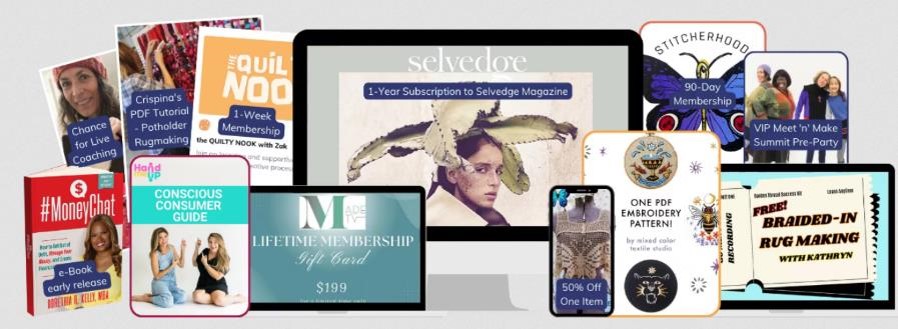
The event was free to all who registered in advance. Just shy of 2000 people joined. An upgrade package of all kinds of bonuses was offered for $100. I popped for that as it included 90 days of access to all the recorded sessions. I knew in advance that I would need time to watch the sessions that didn’t fit my schedule, re-watch and digest some of the presentations at my leisure. A discount subscription to Selvedge magazine sweetened the deal.

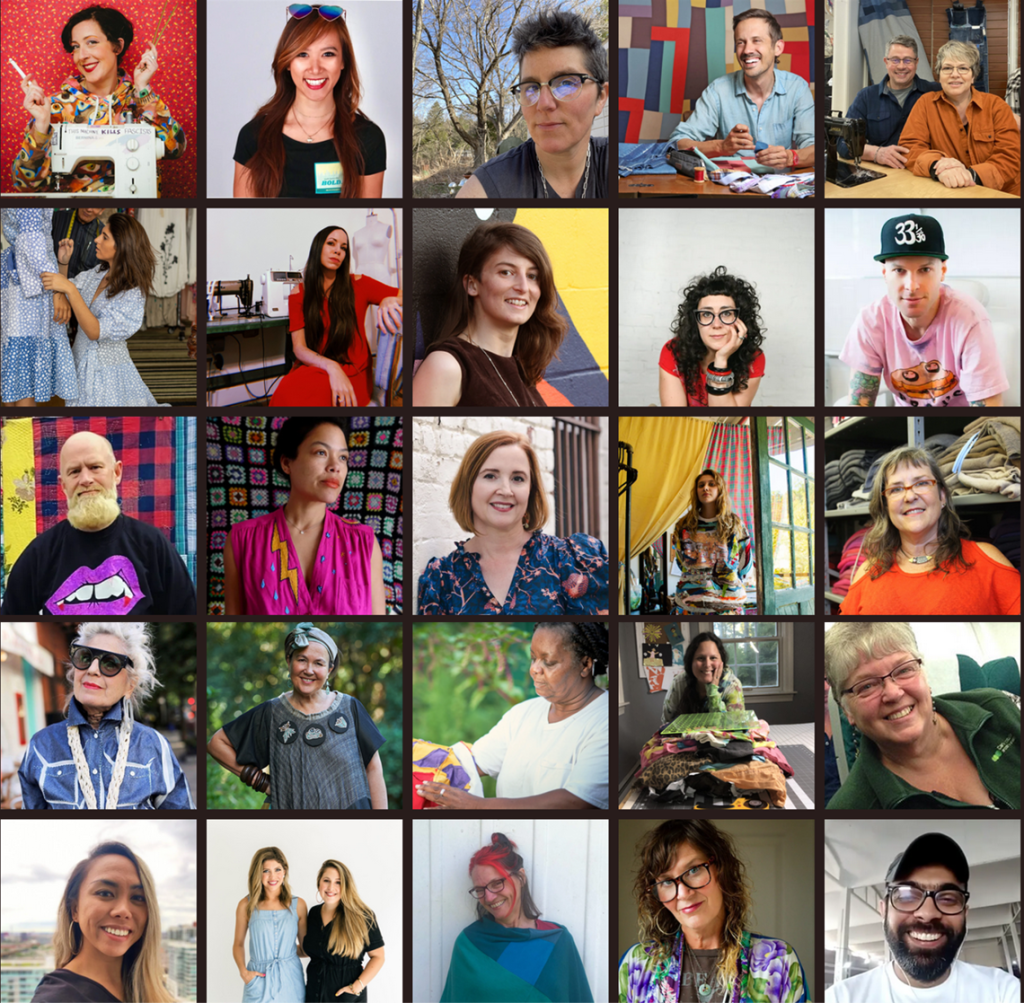
The 3-day event gathered together a broad and impressive roster of presenters who approach the challenges of diverting textiles from the waste stream in a multitude of interesting ways. I can’t do more than fly over a few of them in a blog post, but I’ve included a full list of the presenters and their businesses if you scroll down.

Here are just a few of the many people who offered fascinating and valuable sessions:

Kathryn Greenwood Swanson – a textile merchant for the people, by the people. Offering donated fabrics and supplies that sewers and fiber-artists naturally accumulate and want to pass on.

Frust Upcycling – Seren Atilgan & Esra Kent – sourcing deadstock fabric from the markets of Instanbul to create small-batch garments.

The Garment District -Chris Cassel – “Every morning when the store opens we take an 850lb bale of clothing – snap open the wires and let the public shop…YOU pay by weight…$2.00 per pound…no two days are the same!” Cambridge, MA. This is either my idea of heaven–or an extremely dangerous challenge to my closet and my storage capacity.

Made by Lu Mason BakerLu Mason, A York, UK artist who makes amazing rag rugs from textile discards.

Retold Recycling Amelia Trumble — fill a bag with any textiles you need to discard and send them back. Retold promises (together with partners) to sort your goods, sending them to the different channels to ensure that nothing will end up in landfill!

From one artist making rag rugs to a business of collecting discarded textiles and everything in between, there was an amazing breadth of ideas, methods and creativity. I hadn’t realized that so many people are attacking the problem of textiles in the landfill via business solutions. So heartwarming! I was overwhelmed with hope after being exposed to so much positive activism!

I highly recommend next year’s event. You can sign up to be on the “wait list” here.


More presenters I especially enjoyed included Erin Beatty – https://rentrayage.com/pages/about, Manny Jackson – Thread Haus, Lottie Bertella – LOTI, Clare Herron – Clare Bare, Christi Johnson – Mixed Color, Zak Foster – Zak Foster Quilts, Nicole & Kara – Hand Me UP, and Monica Michelle and Jo Packam – MadeTV

FULL LIST OF PRESENTERS

A truly marvelous pick-and-mix of interesting approaches and resources for you to explore:

A Full English / Chris English

Ambletown / Liz Broekhuyse

Anemone / Ashley Saville

Clare Bare / Clare Herron

Crispina ffrench

Ekologic / Kathleen Tesnakis

ELLERALI / Elle Litiatco

Frust Upcycling / Seren Atilgan & Esra Kent

Garment District / Chris Cassel

Hand Me Up / Nicole Boynton & Kara Livingston

Heke Design / Bea Lorimer

Jessamy Shay – Visible Mending & Slow Fashion

Kitsch’n Couture / Gail Sorkow

Leo’s Lovely Treasures / Sara Ermisch

LOTI / Lottie Bertello

Lu Mason

Made x Hudson / Sergio Guadarrama & Eric de Feo

Maybelle / Christine Carlson

Mixed Color / Christi Johnson

Nudnik / Lindsay Lorusso

Project Vermont by Outerknown / Lise-Anne & Scott Cooledge

The Quilty Nook / Zak Foster

RE.STATEMENT Upcycling Marketplace / Hannah Le

Recover Girl / Jennifer Moore

ReJean Denim / Siobhan McKenna

Rentrayage / Erin Beatty

Retold Recycling / Amelia Trumble

Sideshow Clothing / Meri Avratin

Snow Milk / Doobie Duke Sims

Sow’s Ear / Kerri Chabot

Swanson’s Fabrics / Kathryn Swanson

Thread Haus / Manny Jackson

The Unruffled / Sondra Primeaux

VICKIis / Vicki Rethemeyer

Yvonne and Mitchel / Caylin Y. Willis & Jared M. Armstrong

Scraptastic: Making the Scrap Rabbits

A while ago, in the middle of a very busy month, I impulsively decided to take on the Scraptastic challenge from Ragfinery. It was truly a challenge, and during the course of the project I must admit to some moments of trepidation. I didn’t have time to document it properly as I went along, but here are belated details.

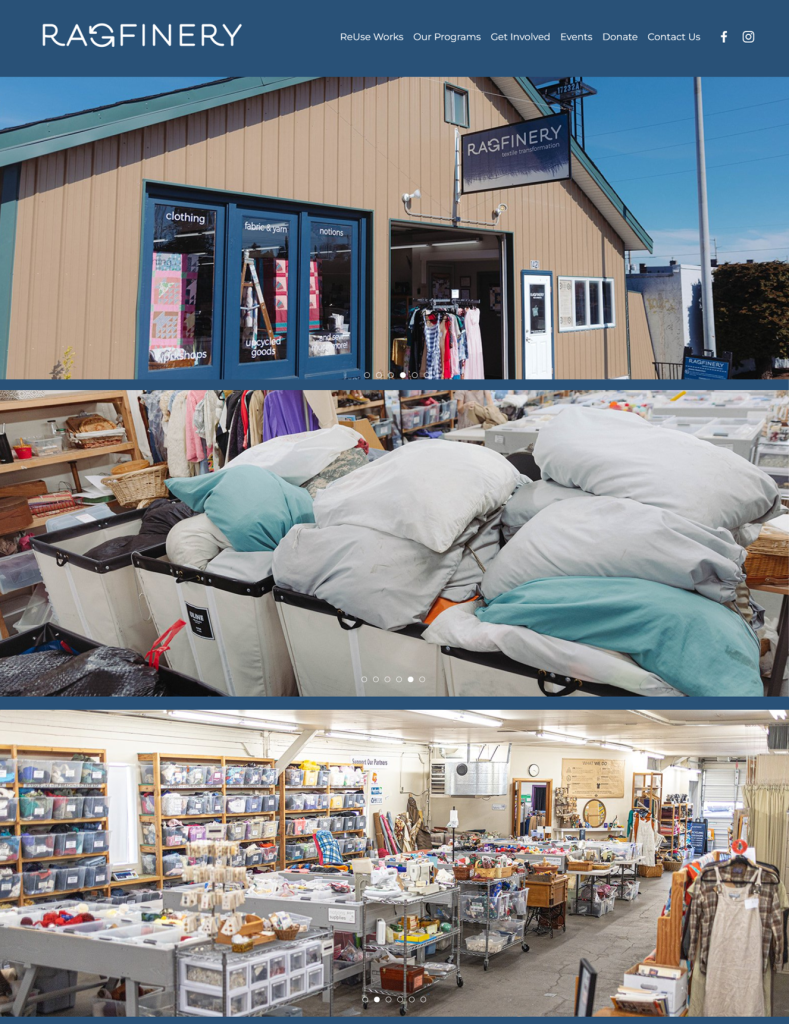
It started with picking up a giant trash bag from Ragfinery, full of textile scraps that were ready to go back out into the world. Ragfinery is Bellingham’s brilliant textile reuse/education initiative. If you’re ever in the area, maybe driving from Seattle to Canada, don’t miss it!

The rules for the challenge were simple:

  • use up everything in the bag
  • no adding ANYTHING but thread

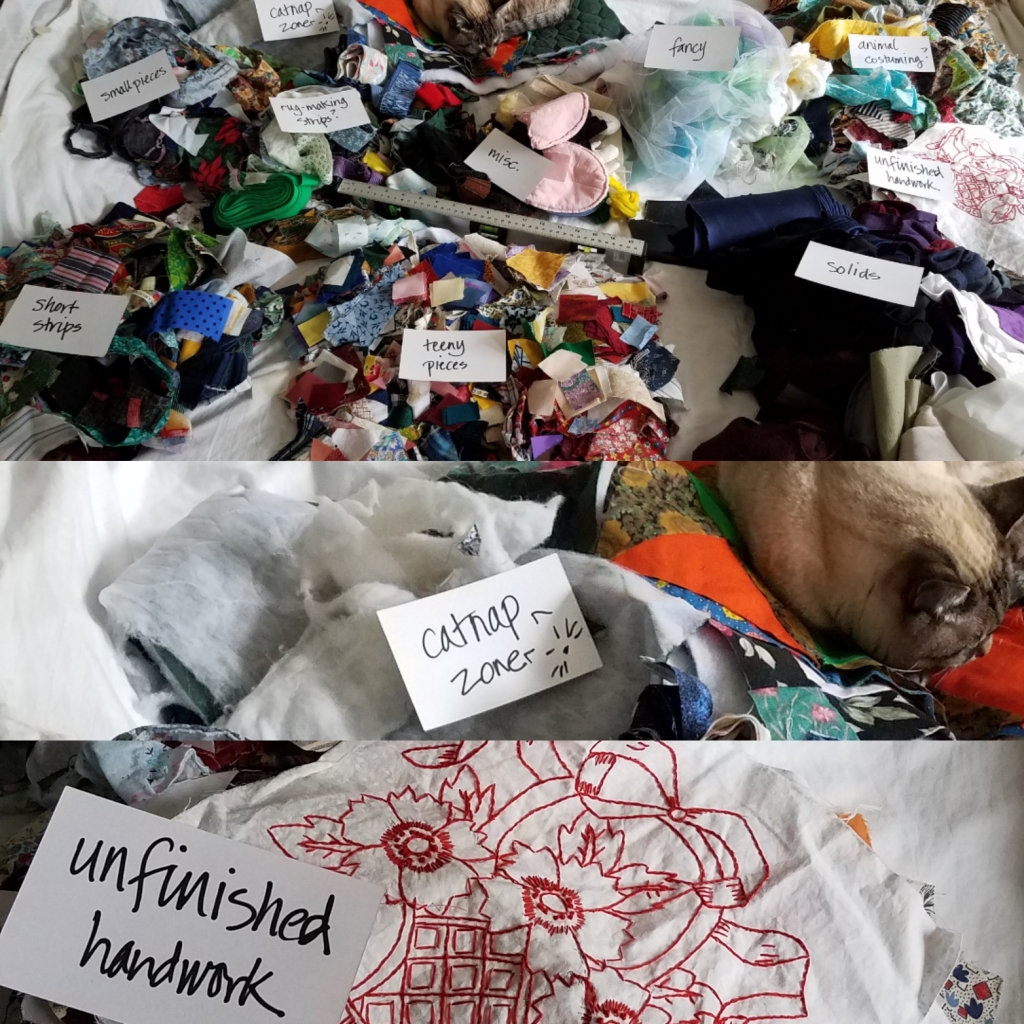
I regret I did not take a photo when I dumped the bag out on my bed in its initial jumble. Take it from me, it was impressive, basically covering up the surface of a queen sized bed.

I knew that if I had a chance of succeeding, the first task was to understand what I had to work with. That meant sorting into categories. A lot of categories. At some point my stripey kitty friend joined the project, under the impression that the goal was to create a cozy catnap zone for her. That’s her little face at the top of the photo below.

Of course, as a toymaker I never questioned how I would meet the challenge. I knew it would be (probably multiple) dressed animals plus wardrobes and accessories for them.

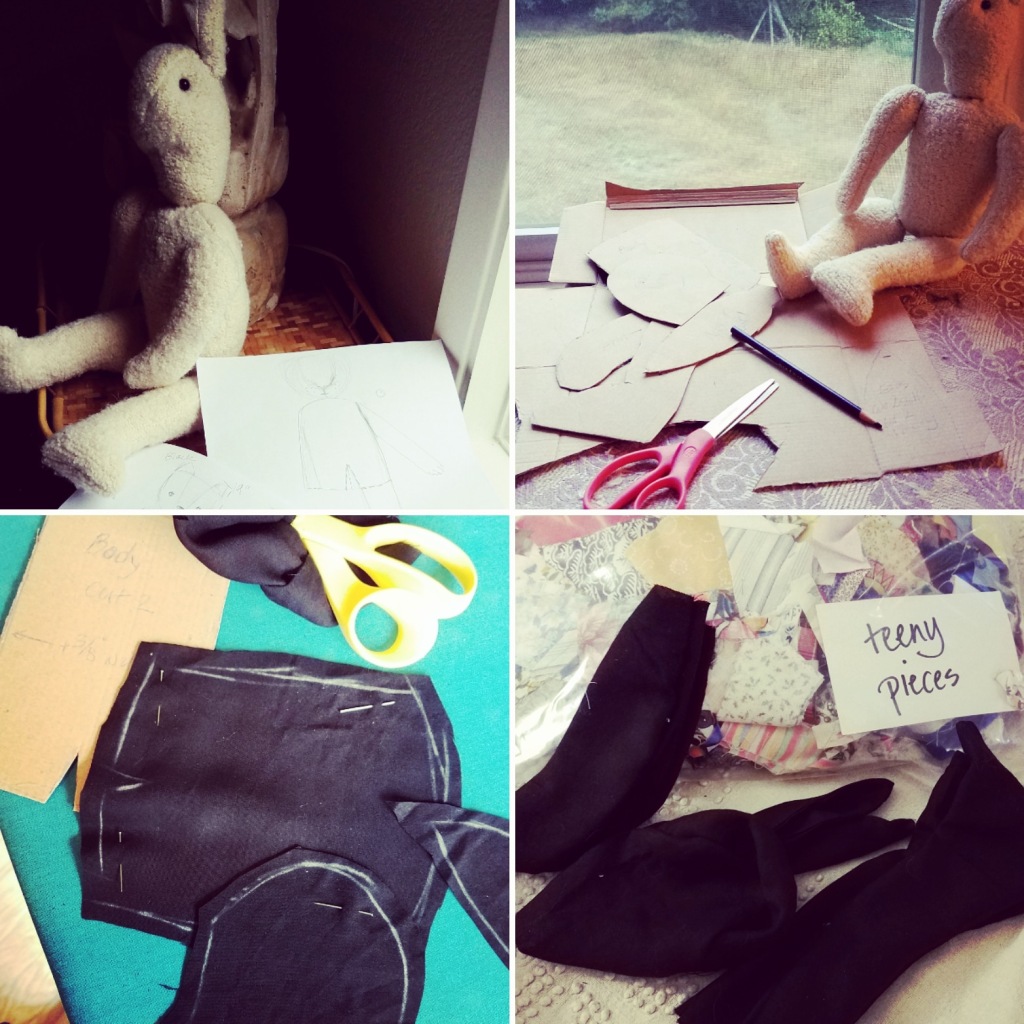
I had been working on a new pattern, trying to make a soft rabbit doll with jointed arms and legs. Still haven’t succeeded with that pattern, but that’s for another day. 🙂

Parts of the pattern seemed like they could work for this project, so I forged ahead, tracing the cardboard pattern pieces onto the few solid fabric pieces that could work for rabbitmaking.

There would be a black rabbit and a grey rabbit, and I would use up all the “teeny pieces” as stuffing.

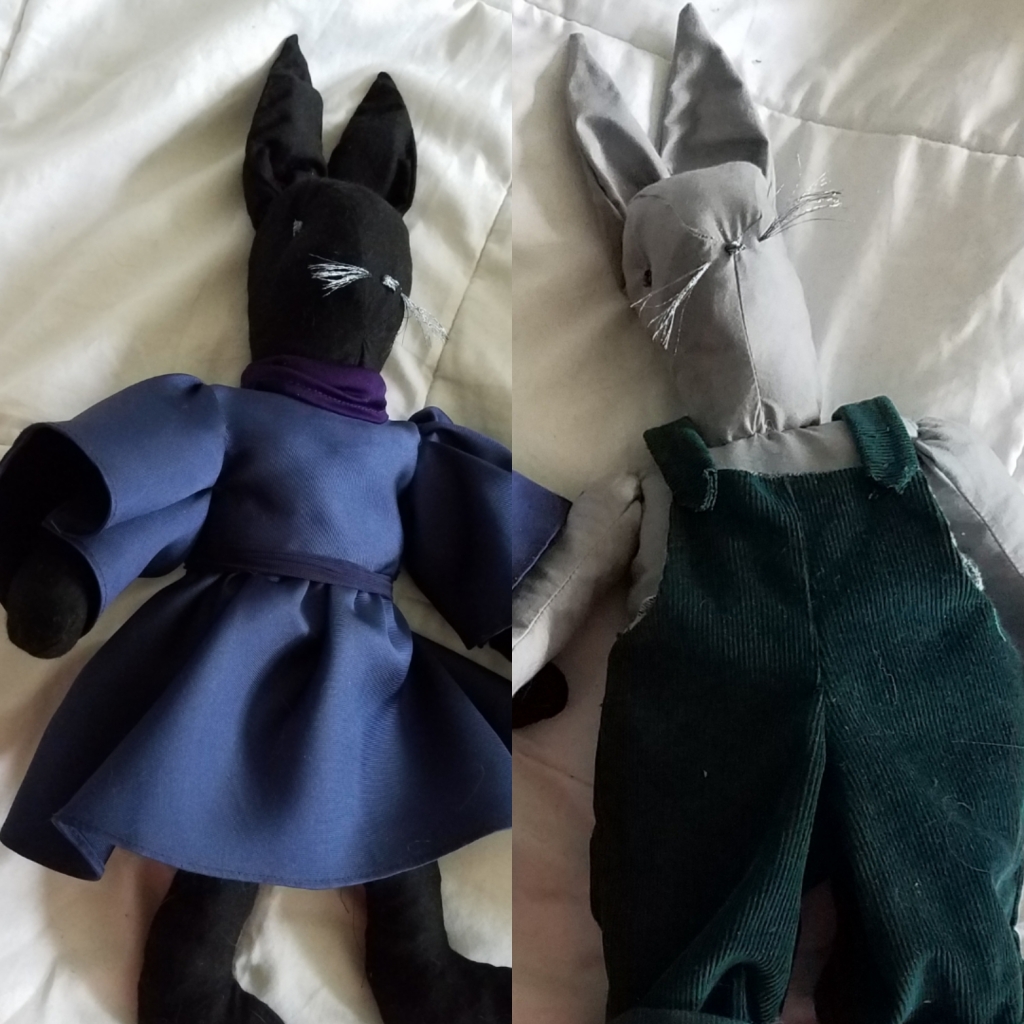
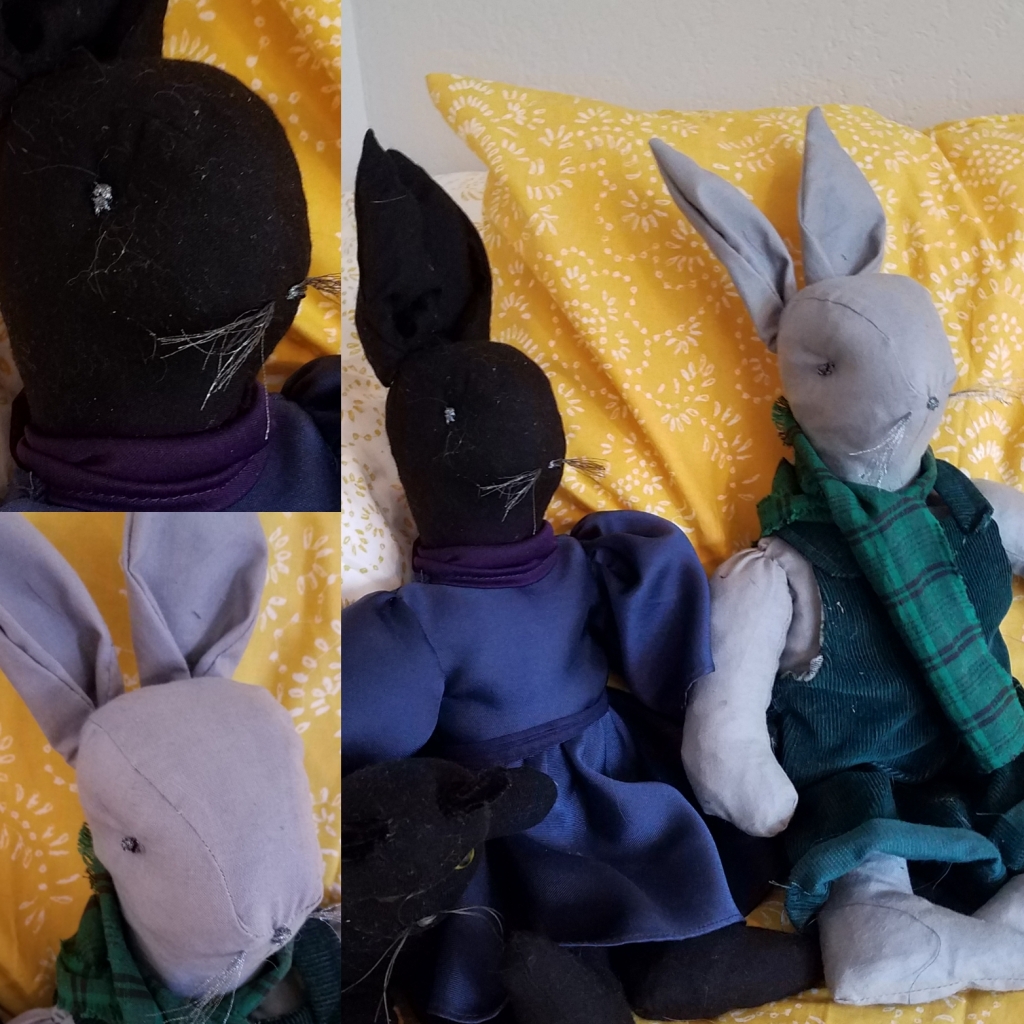
And so they were born, Black Rabbit and Grey Rabbit. I had to use a lot of ingenuity to make their ears work, stiffened a bit and not too lumpy. At some point I embraced a certain amount of lumpiness. Toymaking is like that–animals start to express their characters as you bring them into being–it’s part of the magic.

Since I couldn’t use the button eyes or glass eyes I usually finish faces with, I settled on a silver embroidery thread. It worked for both rabbits–French knot eyes and sprightly whiskers. Part of my design intent was for the rabbits to be non-gendered. Either one could be anything, subject only to the imagination of the person who was playing with them.

Success! I was able to use up that whole bag full of scraps (except for a very few pieces of fine handwork and a few more mini-quilt squares). I knew someone would want to buy those at Ragfinery, so I turned them back in.

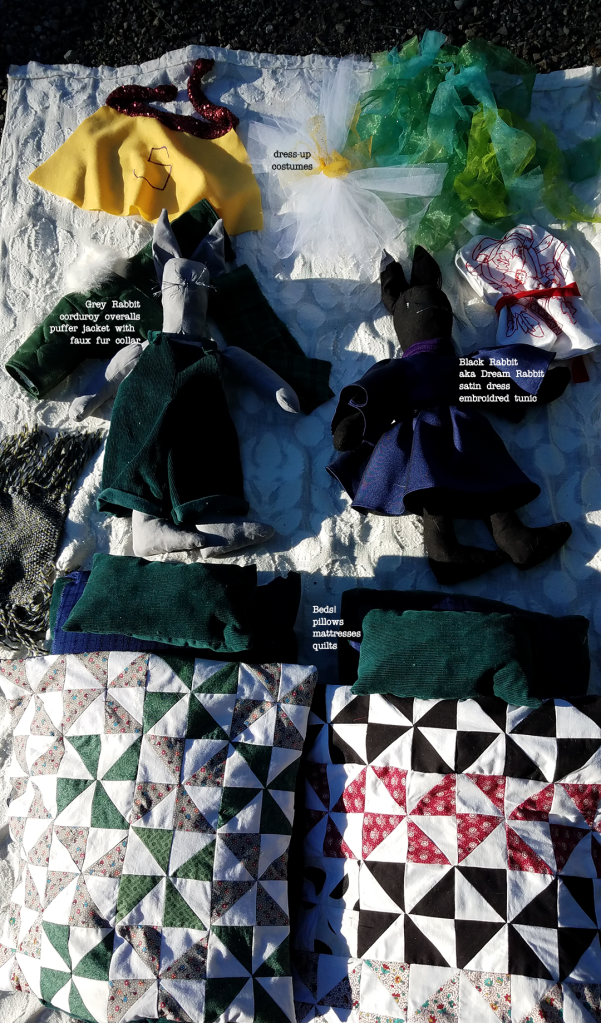
Here’s the whole spread of what the scraps turned into–2 charming rabbits, outfits, costumes and complete bed sets.

I finished just in time to send in my very hasty photos, just under the wire. I’m very happy with the results, and we’ve been enjoying having these two at our house.

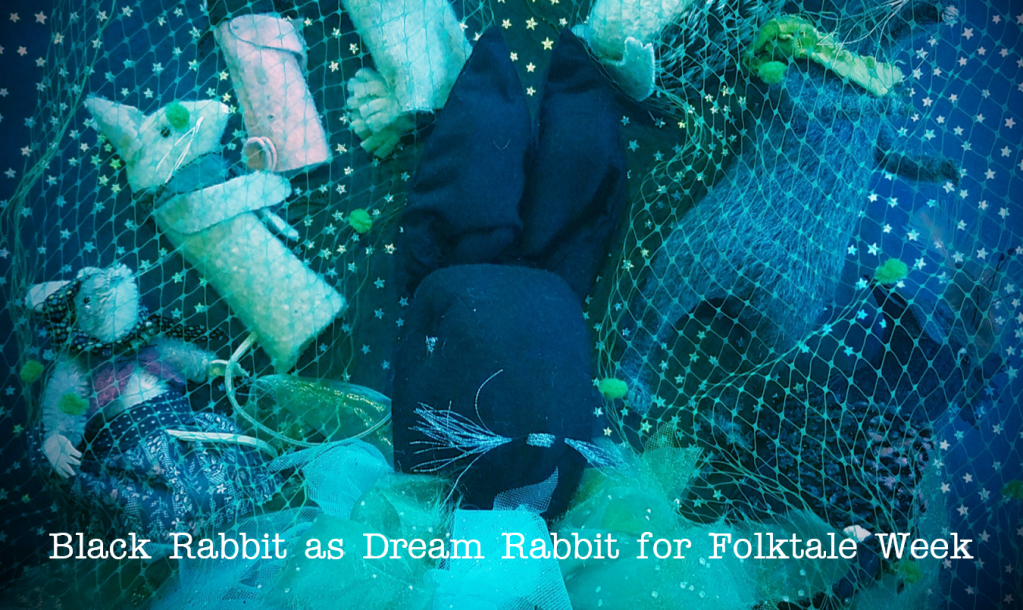
Black Rabbit has turned out to have a rather dramatic streak, and has appeared more than once in Instagram stories as Dream Rabbit, often the hero of Folktale Week stories.

So, the Scraptastic verdict: I can heartily recommend dressed animal toys as a way to reuse textiles. The need for stuffing means it’s easy to repurpose otherwise unusable scraps. Let me know if you’re interested in a copy of the pattern and instructions if you”d like to make some scrap rabbits of your own.

If you’re interested in other toys that can be made from the scrap basket, please check out the finger puppet patterns on my web store. There are so many ways to have fun making toys with little bits of fabric. For inspo, check out what stitchers have made in Ragfinery workshops.

The Rediscovery of Things Past: a Sweet Pleasure of Old Age

A small story of how our yesterdays can refuel our todays…

We’d lived for over 25 years in our house in San Francisco when our big move swept us away to the north. I hadn’t realized that I’d taken for granted how cozily we had nested there. How many small systems and processes we’d built up over the years in that house, which itself was a well-designed mid-century machine for family living.

It’s been close to five years since we moved almost a thousand miles north to our country house snuggled up against the Washington/BC border. But still there are unpacked boxes, and organizing remains a work-in-progress. The pandemic seriously disrupted our settling process since our city life is on the Canada side of the border, our country life is in the US, and Covid severely limited border crossings, and therefore, us. So I’m just now starting to feel like my studio may be settling into an efficient order.

The big move forced us out of our cozy beloved ruts (lemon!) and offered fresh perspectives on our lives (lemonade!). Recently I’ve been reaping some of the rewards of the changes, swept up in a whirlwind of rediscovery of treasures from my past. This time of life often brings long-slumbering desires to the surface. For me, one of those unsatisfied desires centers around textile design, surface design for printed fabrics. It’s an interest I had long relegated to the back burner, but it’s been insistently calling to me.

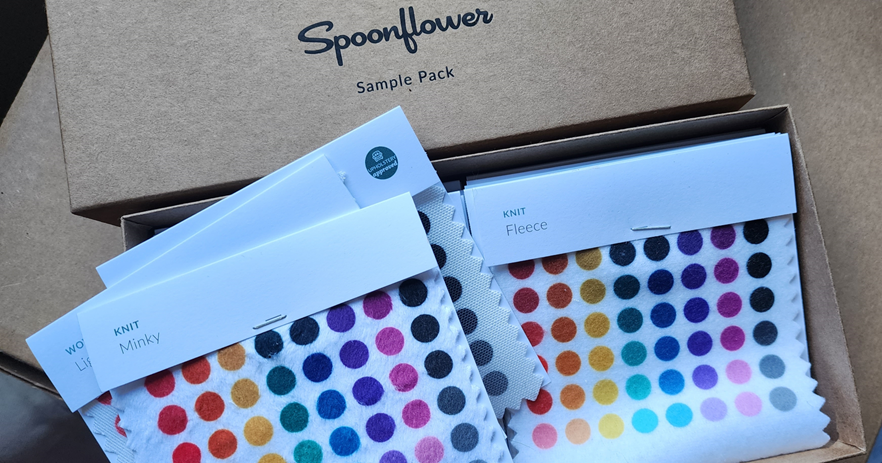
The emergence of print-on-demand options like Spoonflower has brought new potentials to pattern designers, almost like desktop publishing for fabric. I can order a swatch, or a fat quarter, 18 by 22 inches, or a run of yardage, choosing fabric from the thinnest voile to a very chunky canvas–each printed in my own design.

Back in my days at Fiberworks in Berkeley I’d learned the foundations of textile designs, but at that time only professionals had the luxury of seeing their work produced. Fueled by these new, previously unimaginable choices, the textile design craving has been growing rather fierce.

But what do I actually want to print? Aside from a well-formed opinion about what makes textile designs great, I hardly had any idea of what I wanted to carry forward.

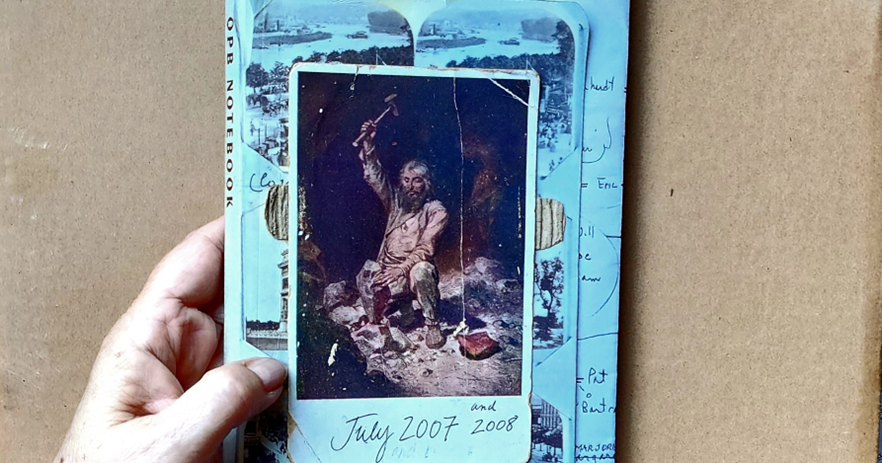
And so that whirlwind of rediscovery came to my rescue, to settle the question. As I was reviewing memorabilia, I idly leafed through a notebook I’d kept in 2007 in London, during a month of exploration.

I was quite startled to come across a series of rough sketches I’d made at the Victoria and Albert Museum and around the streets of the city. My notebook felt like an an invitation to enjoy a fresh look at my experiences from more than 15 years ago.

The V&A Textile Study Room was like Aladdin’s cave to me at that time, brimming with fabric treasures. Have you ever had a time in your life when you couldn’t believe how lucky you were? That’s how it was for me as I basked in the pleasure of being so present with the immediacy of those materials.

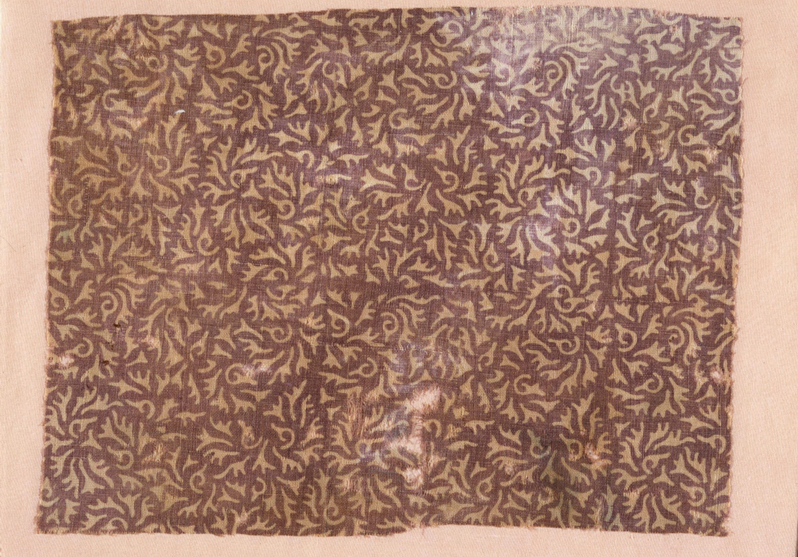
For a textile-lover, there’s an intense satisfaction in being able to look at an actual piece of fabric like this one below, block printed resist and mordant dyed cotton from Gujarat in Western India, possibly 700 years old. Exploring the repeat pattern, and thinking about the skilled hands that crafted it, so far across time, with such a lively dynamic esthetic that is still energetic and fresh today. Not in a photograph, it’s as intimate and different a view as looking at a Van Gogh painting rather than a picture in a book or a print.

Somehow I had forgotten how many sketches I’d made in that small sketchbook cache. Opening it up now and leafing through it is like drinking in a deep pool of nourishment from my past, almost forgotten, but still accessible. Sketches from the Textile Study Room, silhouettes of unfamiliar birds, and even the candied eggplant dessert we shared at the Turkish restaurant are fertile territory for Spoonflower explorations after years of slumber in that little book.

After that visit I had dreamed of spending a month in London and sketching in the Textile Study Room every single day. But…the next time I was back at the V&A, the room was closed for remodeling. Then the textile frames were reborn as a photographs gallery. More recently, most of the collection was transferred to digital access.

I do not question the care and conservation that have taken the materials at one remove from the casual museum visitor. They’re more safely preserved now, as well as visible to viewers around the world. But I’ll always be endlessly grateful that I spent as many hours as I could in the Textile Study Room while it was possible to see so many pieces up so close.

I’ve scanned in my old sketches and begun to play more actively to try out some fabric designs. At the same time, I’m carrying forward new respect for the inspiration that’s hidden away in my own personal journeys, waiting for rediscovery.

I hope you’re rediscovering treasures from your past, as well. So much of life is about change, and the assumption that things will always be there to visit again is often doomed to disappointment. While there’s something to be said for living cautiously and postponing pleasures, there are resonating pleasures that come from eating dessert first!

If you’d like to explore the treasure hoard of the Victoria and Albert Museum’s stellar online collection yourself, I’ve written a how-to here to make it easy to access.

Please share any stories like this from your life. Do you have a long-buried wish that’s been rejuvenated by the revisiting your history? I’d love to hear that story!